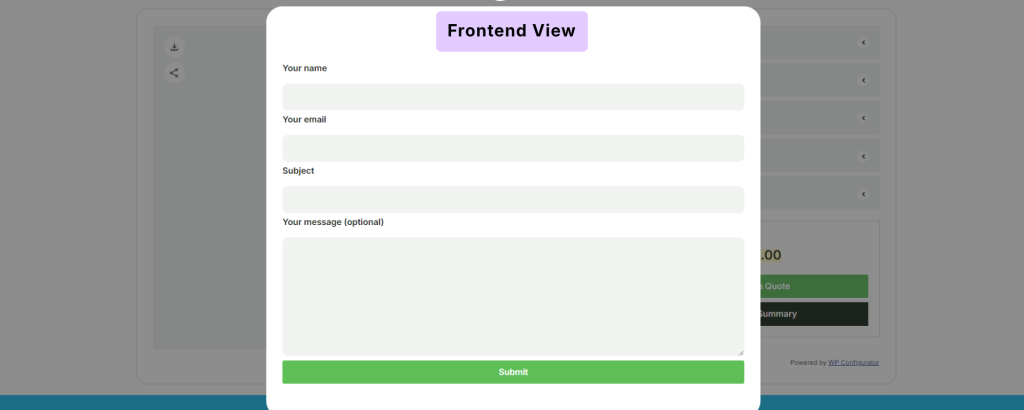
Contact Form 7 integration allows you to connect your 3D Product Configurator with Contact Form 7 and use a Contact Form 7 form to collect customer information and configured product details.
This is useful when you want customers to submit their configured product through a form instead of adding the configuration directly to a WooCommerce cart.
Requirements
Before setting up the integration, make sure you have:
- 3D Product Configurator Pro by WP Configurator installed and activated.
- Contact Form 7 installed and activated.
- At least one Contact Form 7 form created.
Step 1: Install and Create a Contact Form 7 Form
First, make sure the Contact Form 7 plugin is installed and activated on your WordPress website.
After activation, go to:
- WordPress Dashboard → Contact → Contact Forms
- Create a new form or use an existing Contact Form 7 form.
- Configure the form fields according to the information you want to collect from your customers.
For example, your form may include:
- Name
- Phone
- Company
- Message
- Other customer information
Save the form after completing the setup.
Step 2: Enable the Contact Form 7 Module
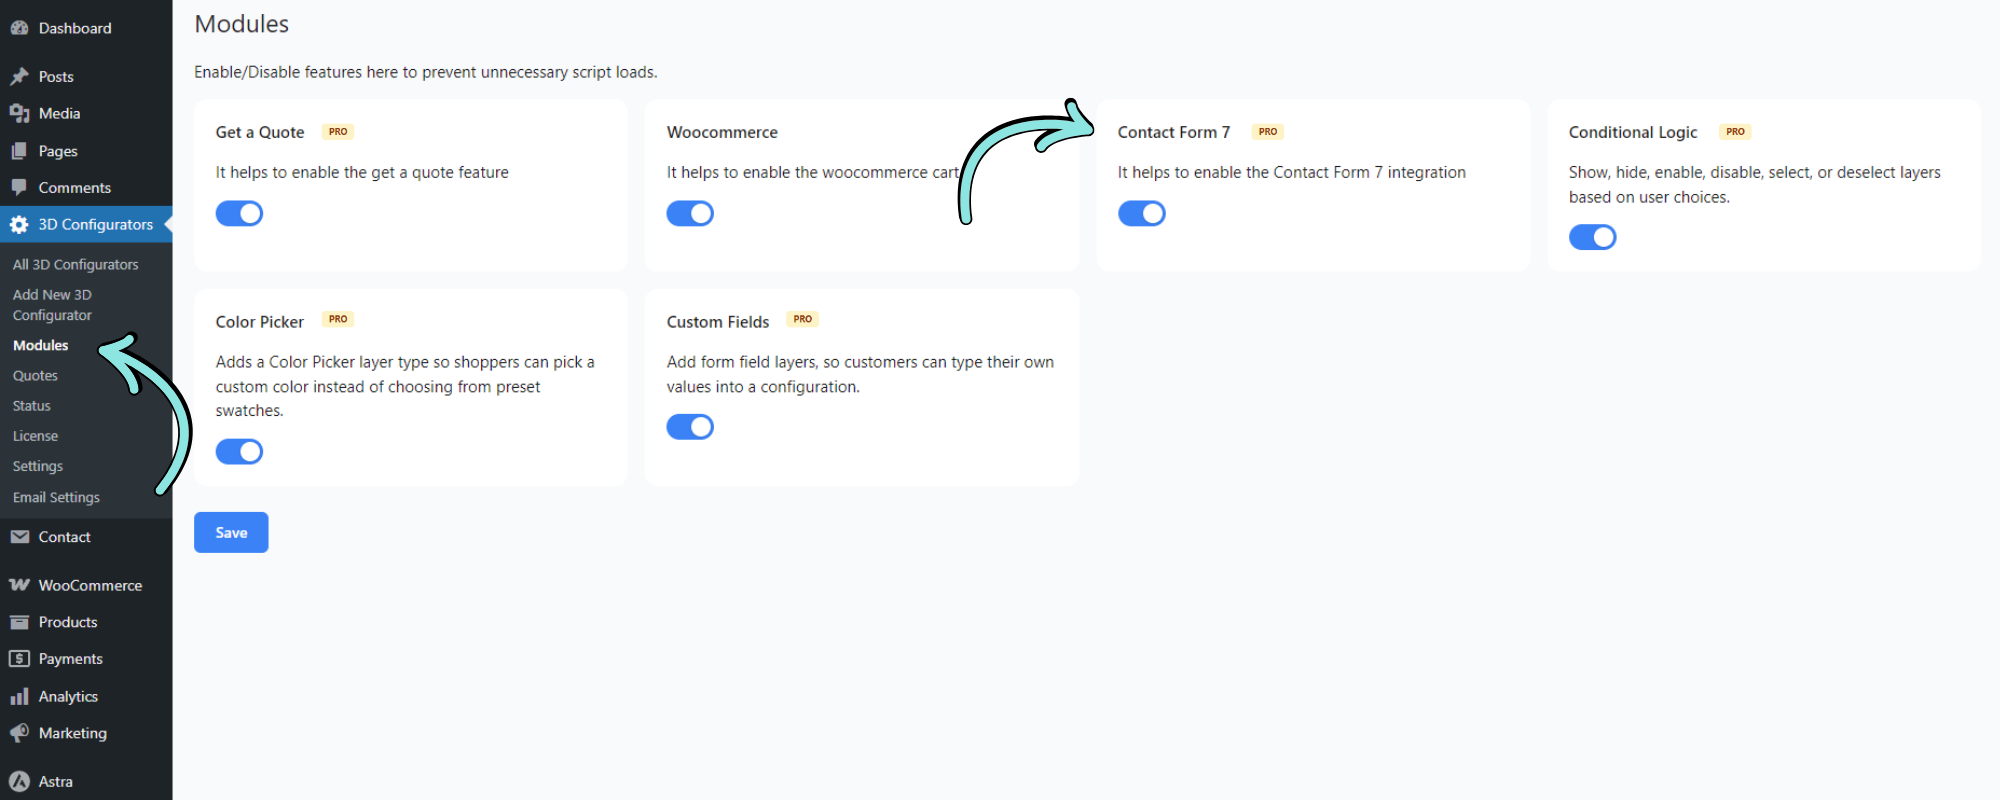
The Contact Form 7 integration must be enabled before it can be selected in the 3D Configurator.
Go to:
- WordPress Dashboard → 3D Configurators → Modules
- Locate the Contact Form 7 module.
- Enable the Contact Form 7 toggle and click Save.
Why enable the module?
The Modules screen allows you to enable or disable specific features so that unnecessary scripts are not loaded.
When Contact Form 7 integration is not required, the module can remain disabled.
Step 3: Open the 3D Configurator
Go to:
- WordPress Dashboard → 3D Configurators → All 3D Configurators
- Open the 3D configurator you want to configure.
- Click Global Settings.
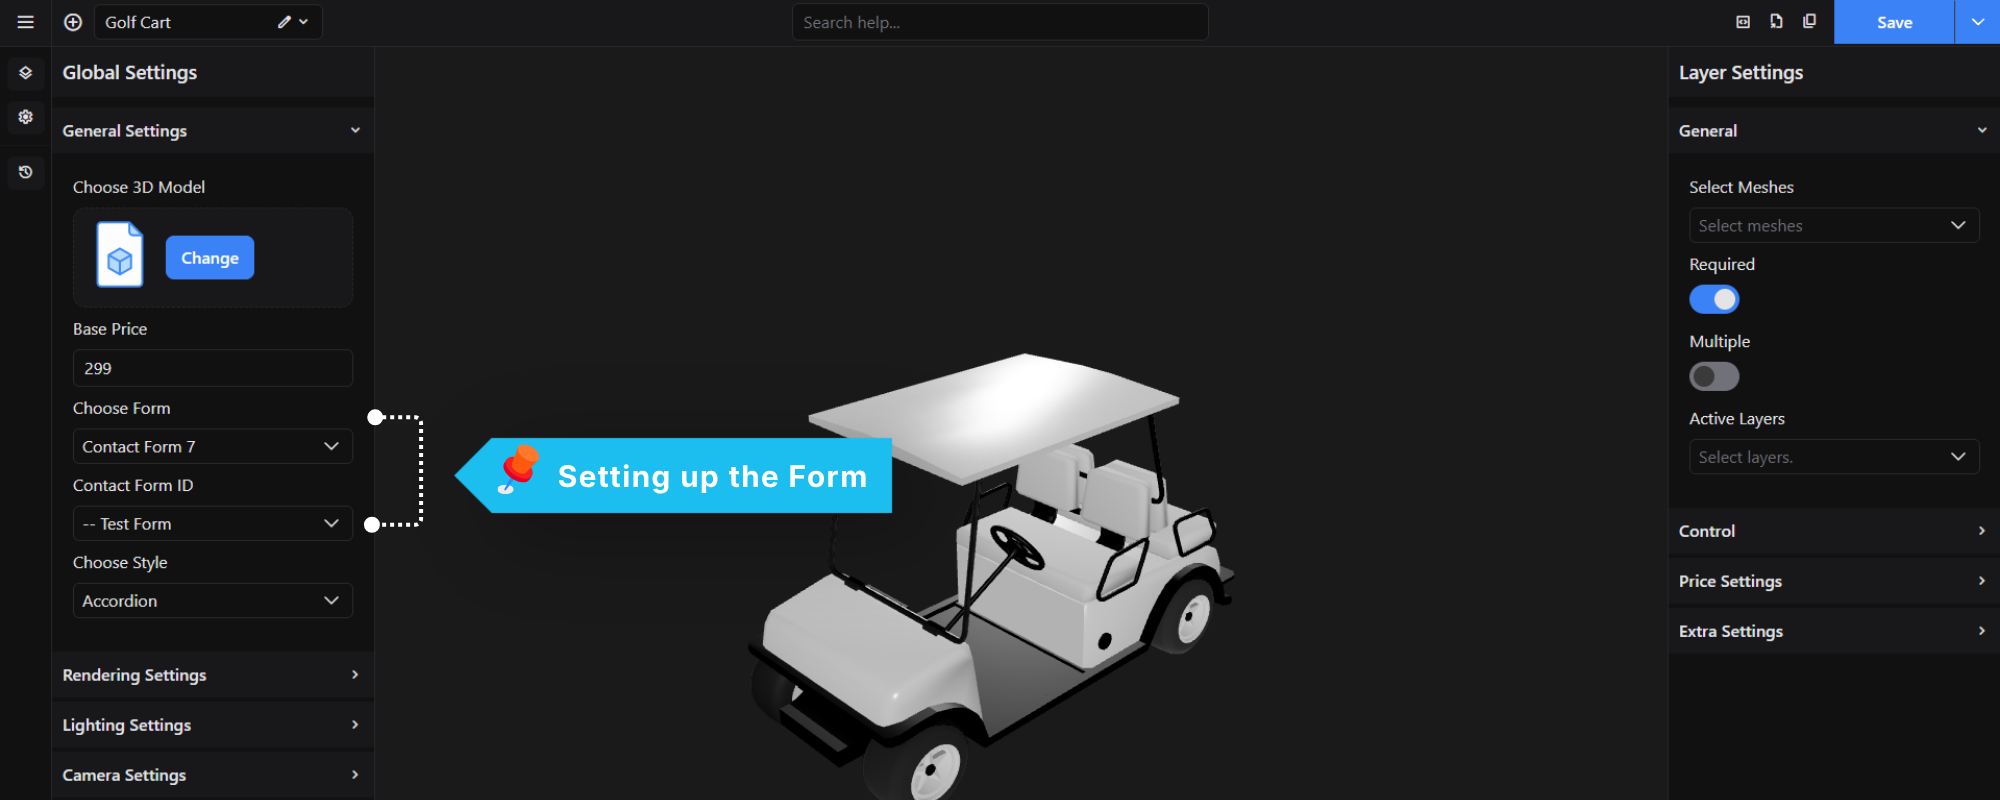
- Under General Settings, locate the Choose Form option.
Open the dropdown and select:
Contact Form 7
After selecting Contact Form 7, an additional Contact Form ID field will appear.
Choose Form
The Choose Form field determines which form type the configurator will use.
Available options may include:
- Get a Quote
- Contact Form 7
- WC Cart Form
For Contact Form 7 integration, select Contact Form 7.
Contact Form ID
After selecting Contact Form 7, use the Contact Form ID dropdown to select the Contact Form 7 form you created earlier.
For example:
Choose Form
[ Contact Form 7 ]

Contact Form ID
[ -- Test Form ]
Select the appropriate form from the dropdown.
Step 5: Save the Configurator
After selecting the Contact Form 7 form, save your 3D configurator settings.
The selected Contact Form 7 form will now be associated with the configurator.
Step 6: Test the Contact Form 7 Integration
Open the frontend page containing your 3D configurator.
Configure the product by selecting different options.