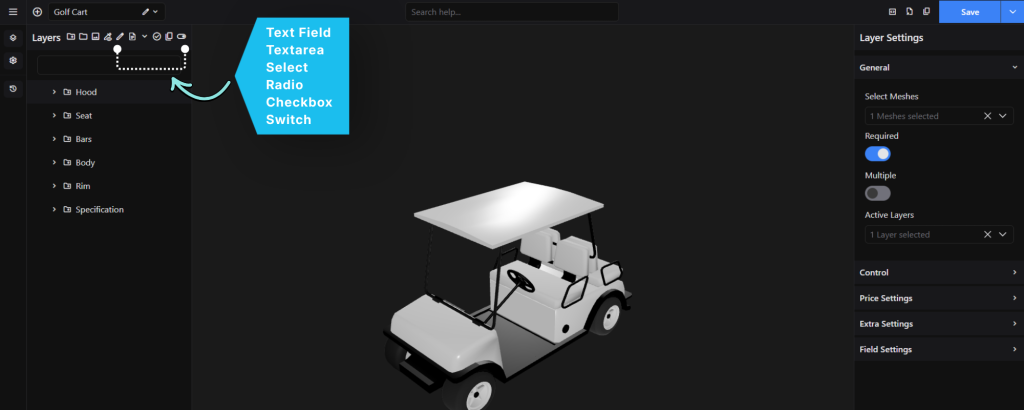
The Custom Input Fields feature allows you to add different types of input fields to your 3D product configurator. These fields allow customers to enter information or make selections while configuring a product.
The available Custom Input Field types are:
- Text Field
- Textarea
- Select
- Radio
- Checkbox
- Switch
Enable the Custom Fields Module
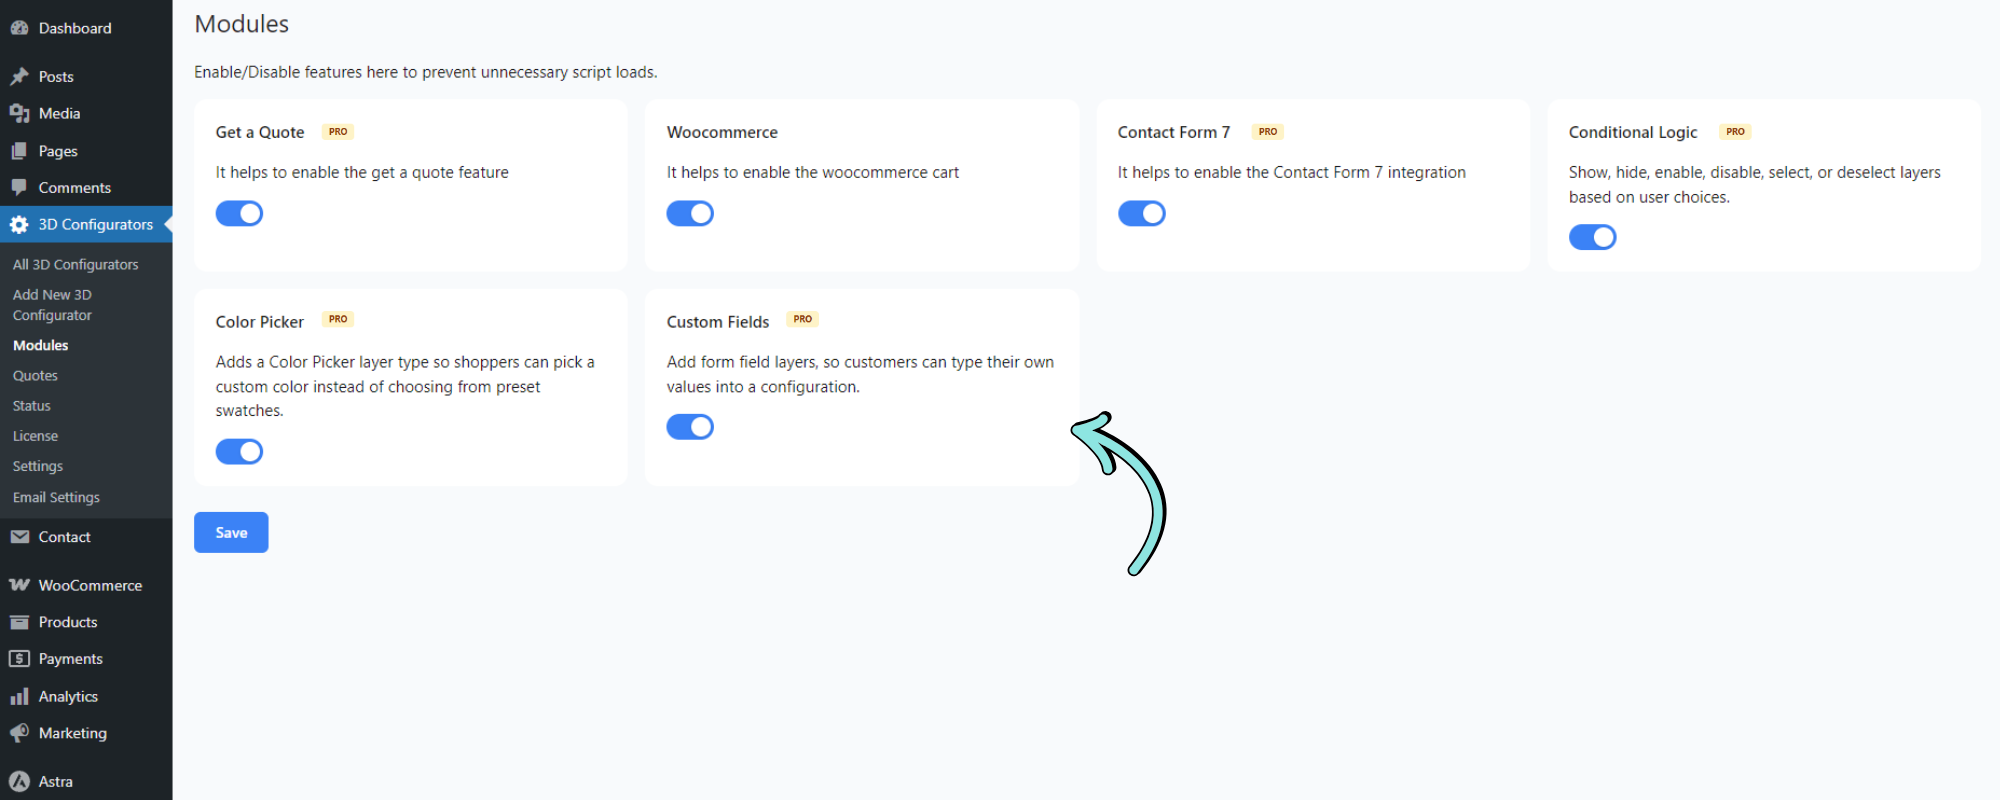
Before adding Custom Input Fields, you must first enable the Custom Fields module.
- Go to 3D Configurators → Modules from your WordPress dashboard.
- Locate the Custom Fields module.
- Enable the toggle.
- Click Save.
Once enabled, the Custom Input Field options will become available in the 3D Configurator editor.
Note: The Custom Fields module must be enabled before you can add Custom Input Fields to your configurator.
Add a Custom Input Field
After enabling the Custom Fields module:
- Open your 3D Configurator.
- Go to the Layers section.
- The Custom Input Field options are available beside the Layers controls.
- Select the input field type you want to add.
- The field will be added to the Layers list.
- Select the newly added field to configure its settings from the Layer Settings panel.