
Audience: shop owners setting up Custom Text in the configurator editor.
Not for: 3D artists (see custom-text-blender-guide) or developers (see custom-text-developer-guide).
Applies to: plugin v1.3.6
Last updated: 2026-11-04
Custom Text lets your customers type their own words – a name, a number, a short message – and see them appear on the 3D model as they type. Think of a name on the back of a shirt, a number on a jersey, or initials on a mug.
Pro only. Custom Text is not included in the Lite version.
Before you start
You need two things, and one optional step:
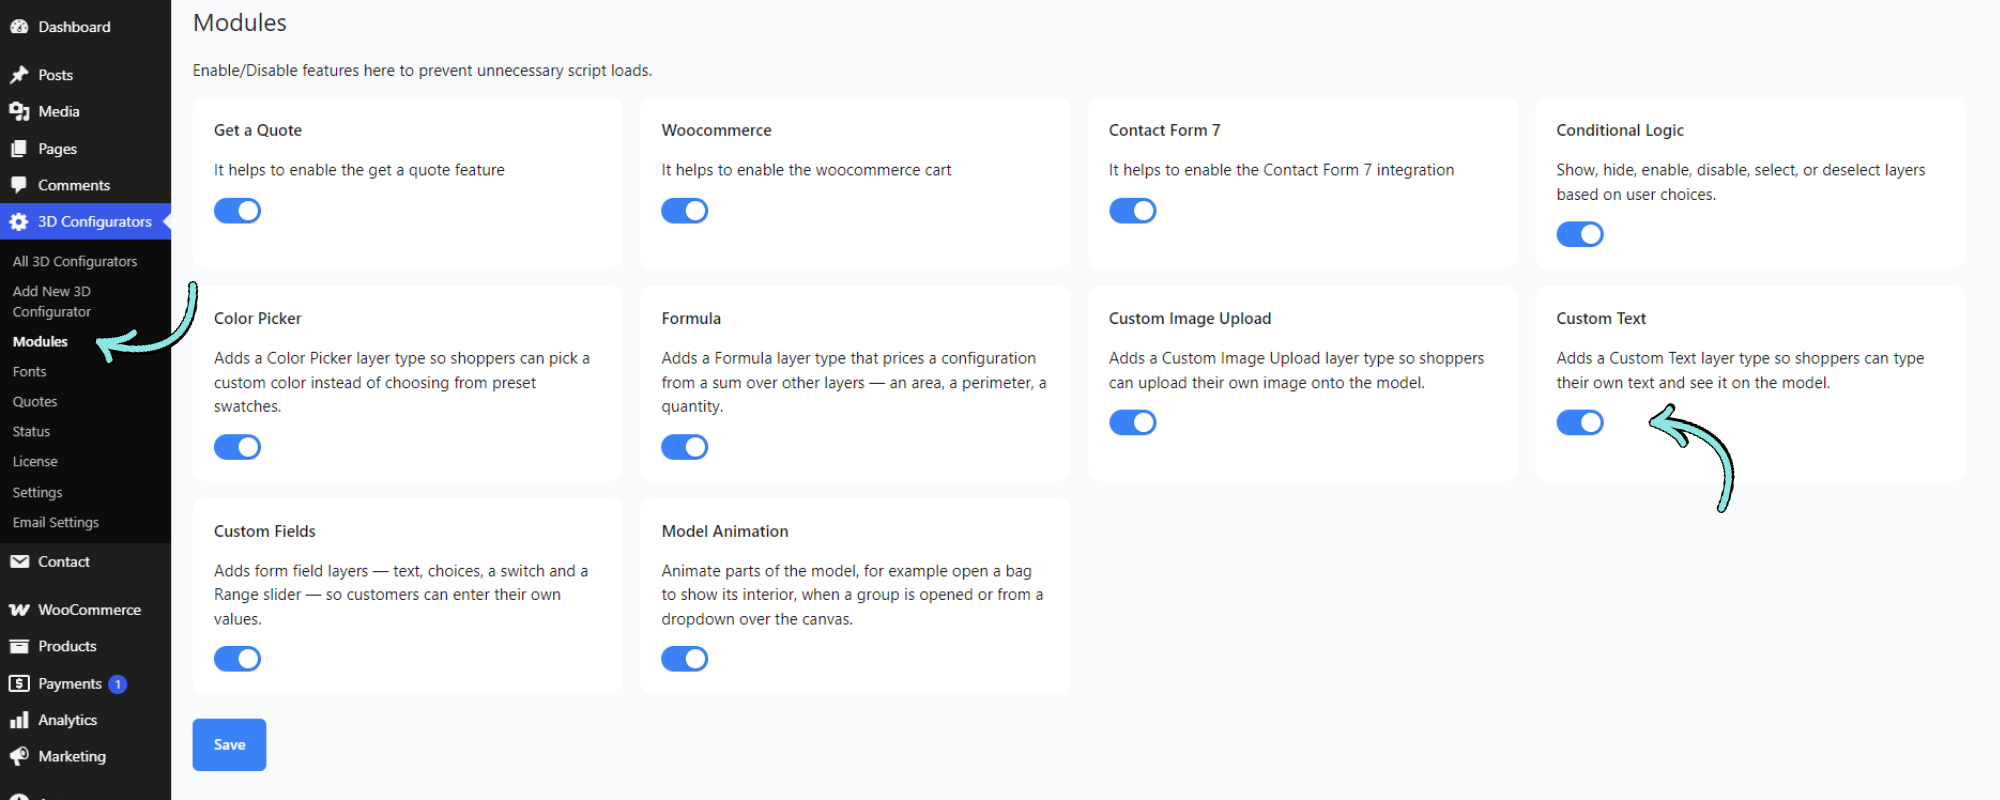
- The module switched on. Go to wp3dconf → Modules and turn on Custom Text.
- A model that has a place for the text. Your 3D designer prepares a part of the model (a “text mesh”) that the words are drawn on. If you are not sure whether your model has one, send your designer the Blender guide.
- Fonts to offer (only if you want customers to choose a font). Add them once on the Fonts page. See Add your fonts.
Add a Custom Text layer
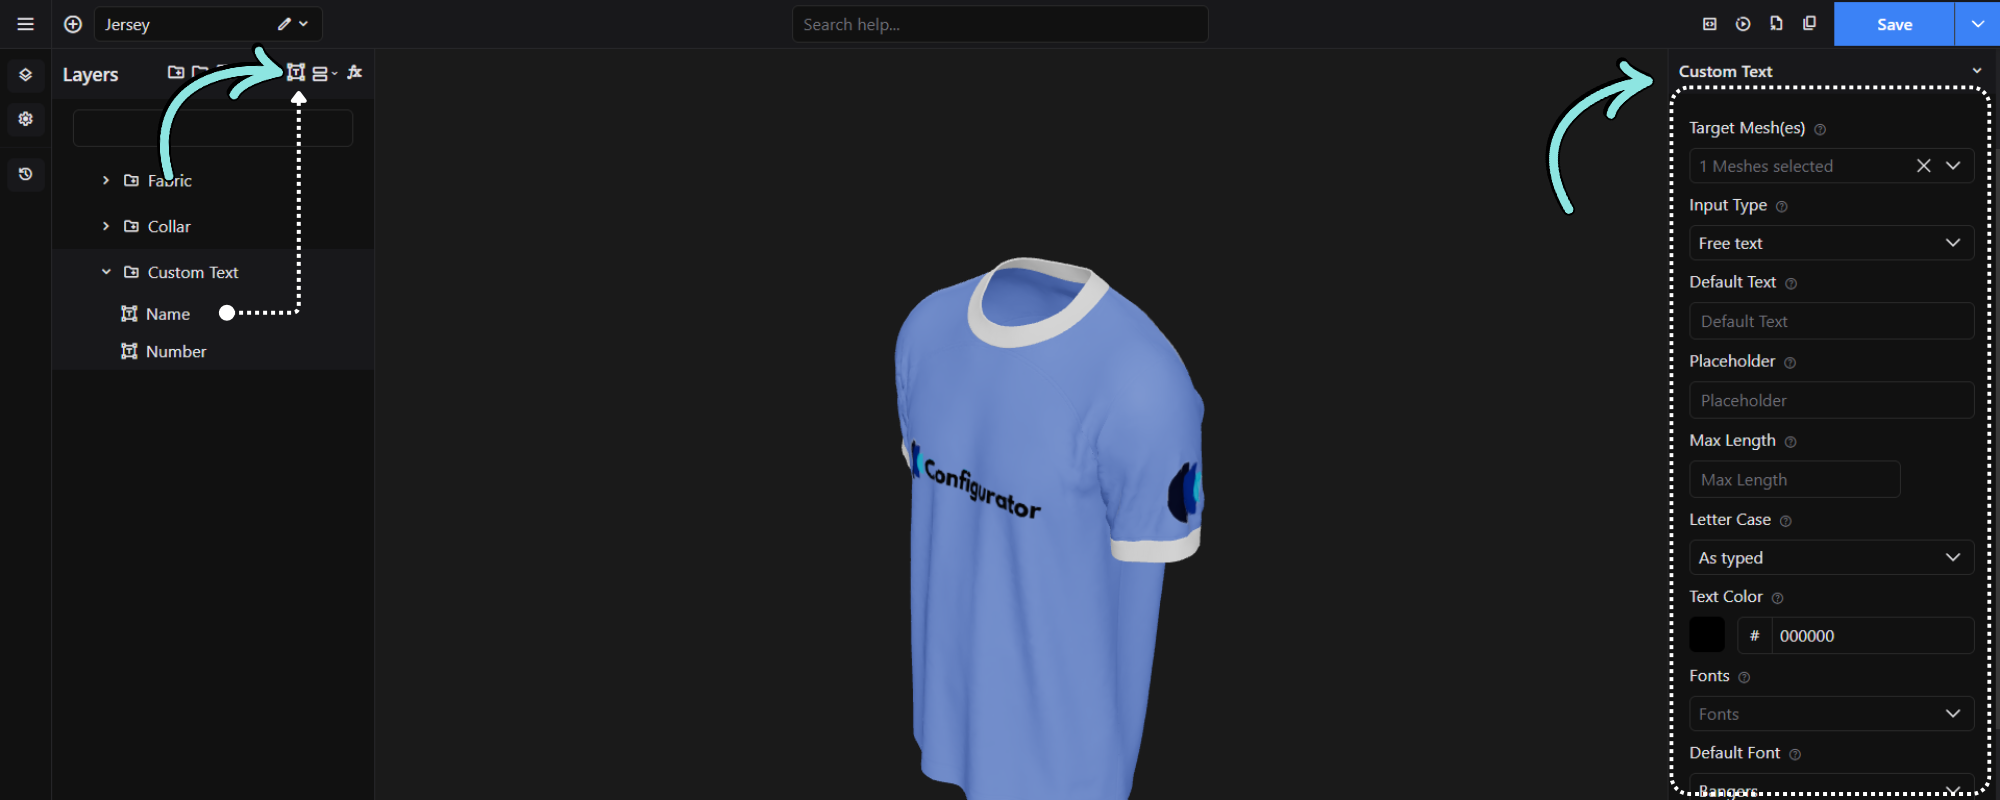
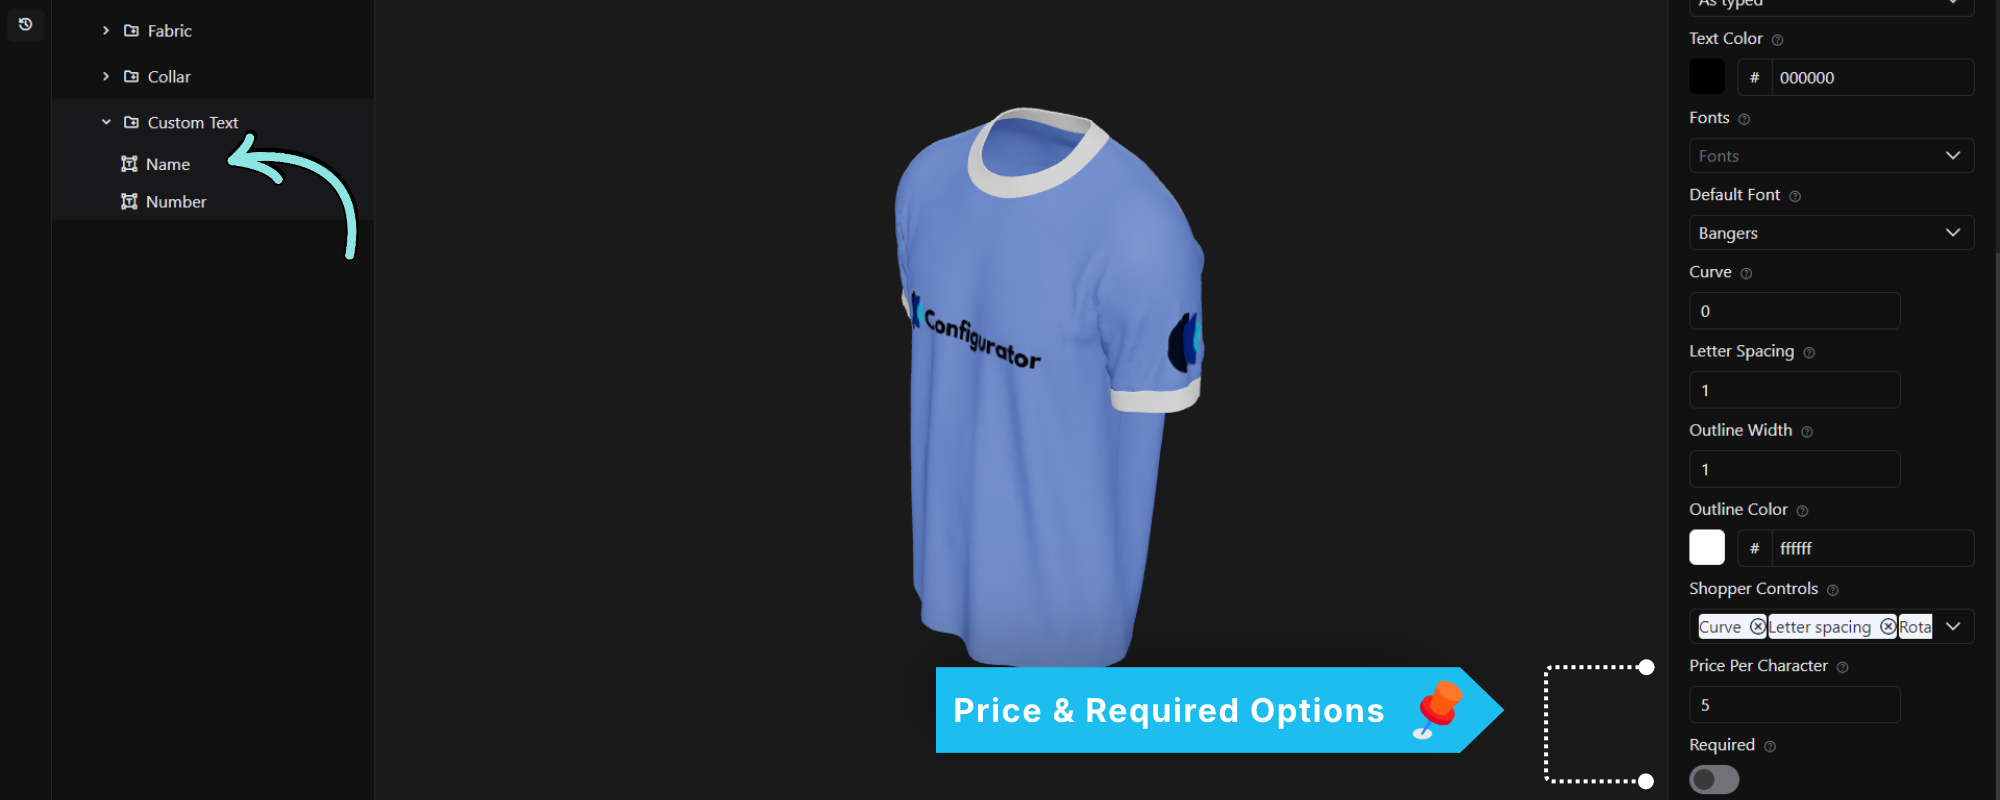
- Open your configurator in the editor and go to the Model Structure tab.
- Drag Custom Text from the list of layer types into your structure, usually inside a group.
- Give the layer a name. Customers see this name above the text box, for example Back name.
- Open the layer’s settings. You will find a Custom Text section. The sections below explain each setting.
Choose where the text appears
| Setting | What it does |
|---|---|
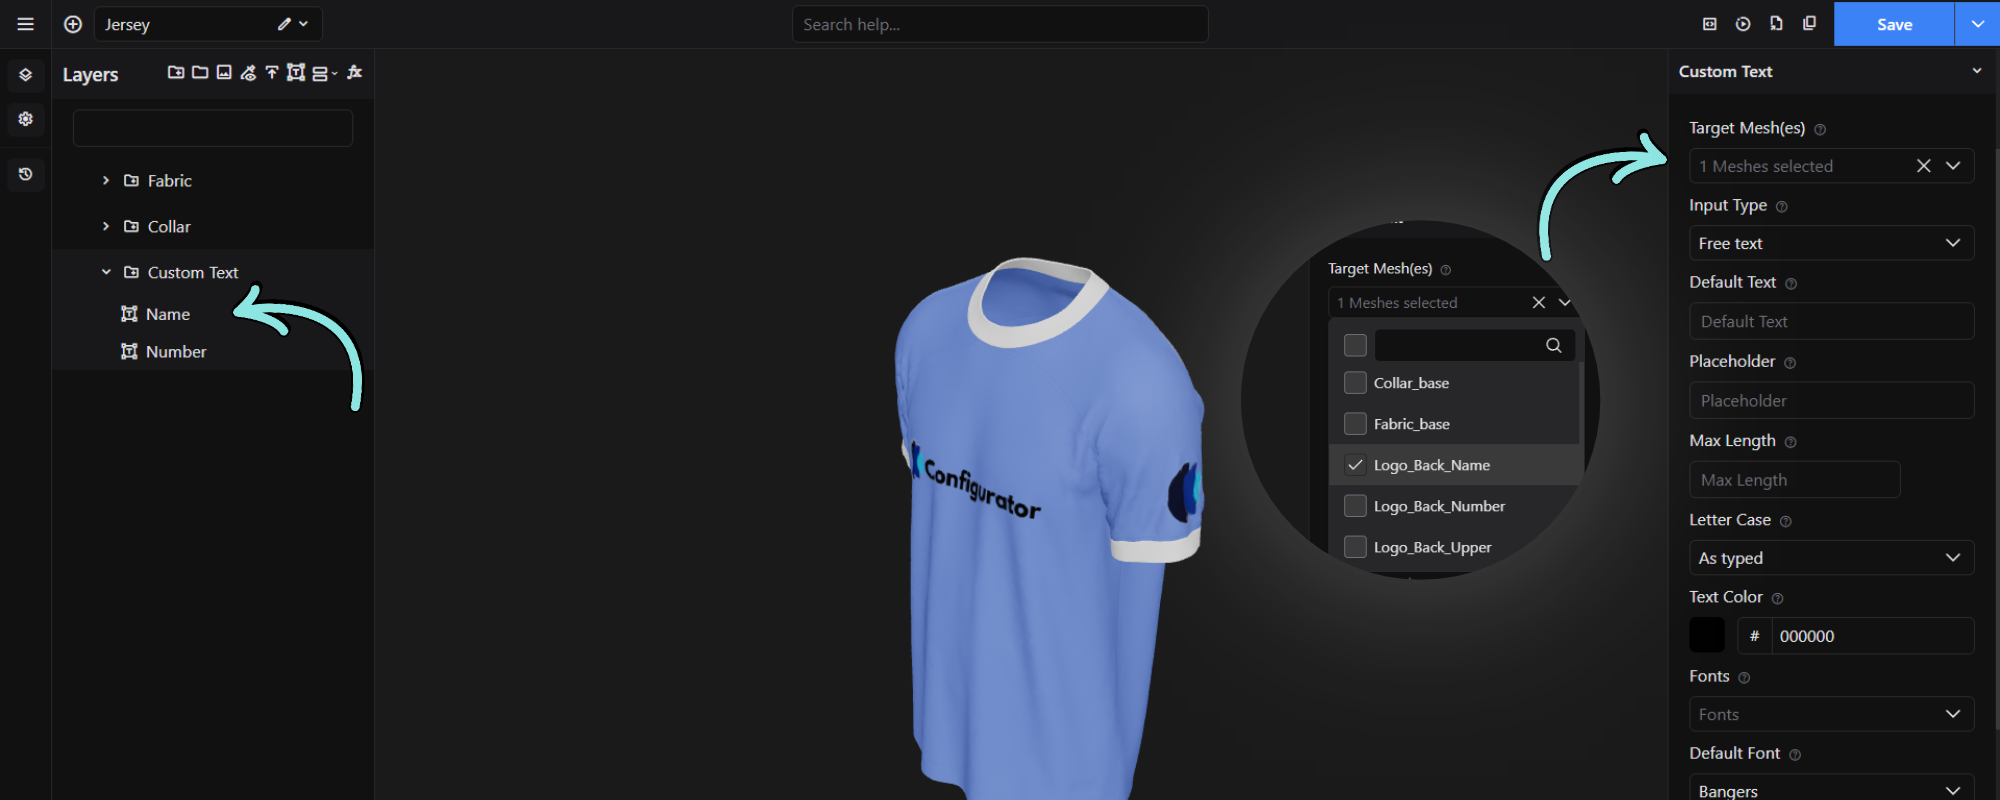
| Target Mesh(es) | The part of the model the text is drawn on. Pick the part your designer made for it. |
You can pick more than one part. The same text then shows in every place at once, for example on the front and the back.
If no part is picked, customers see the message “This text area is not set up correctly yet”. Pick a mesh to fix it.
What customers can type
| Setting | What it does |
|---|---|
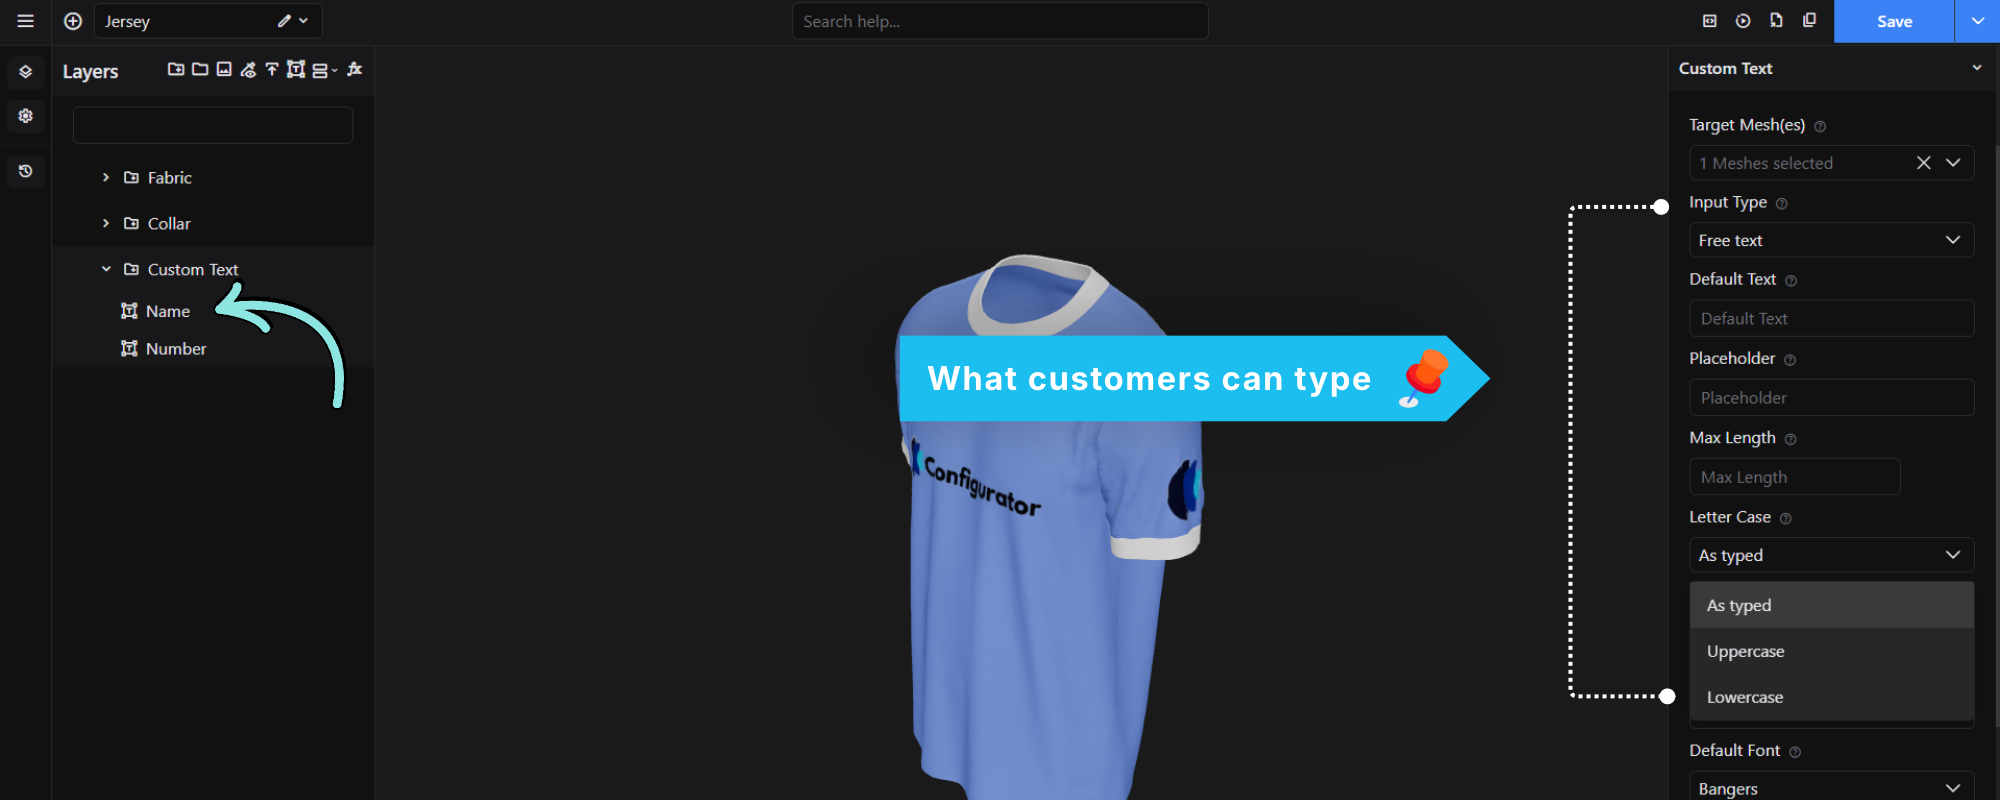
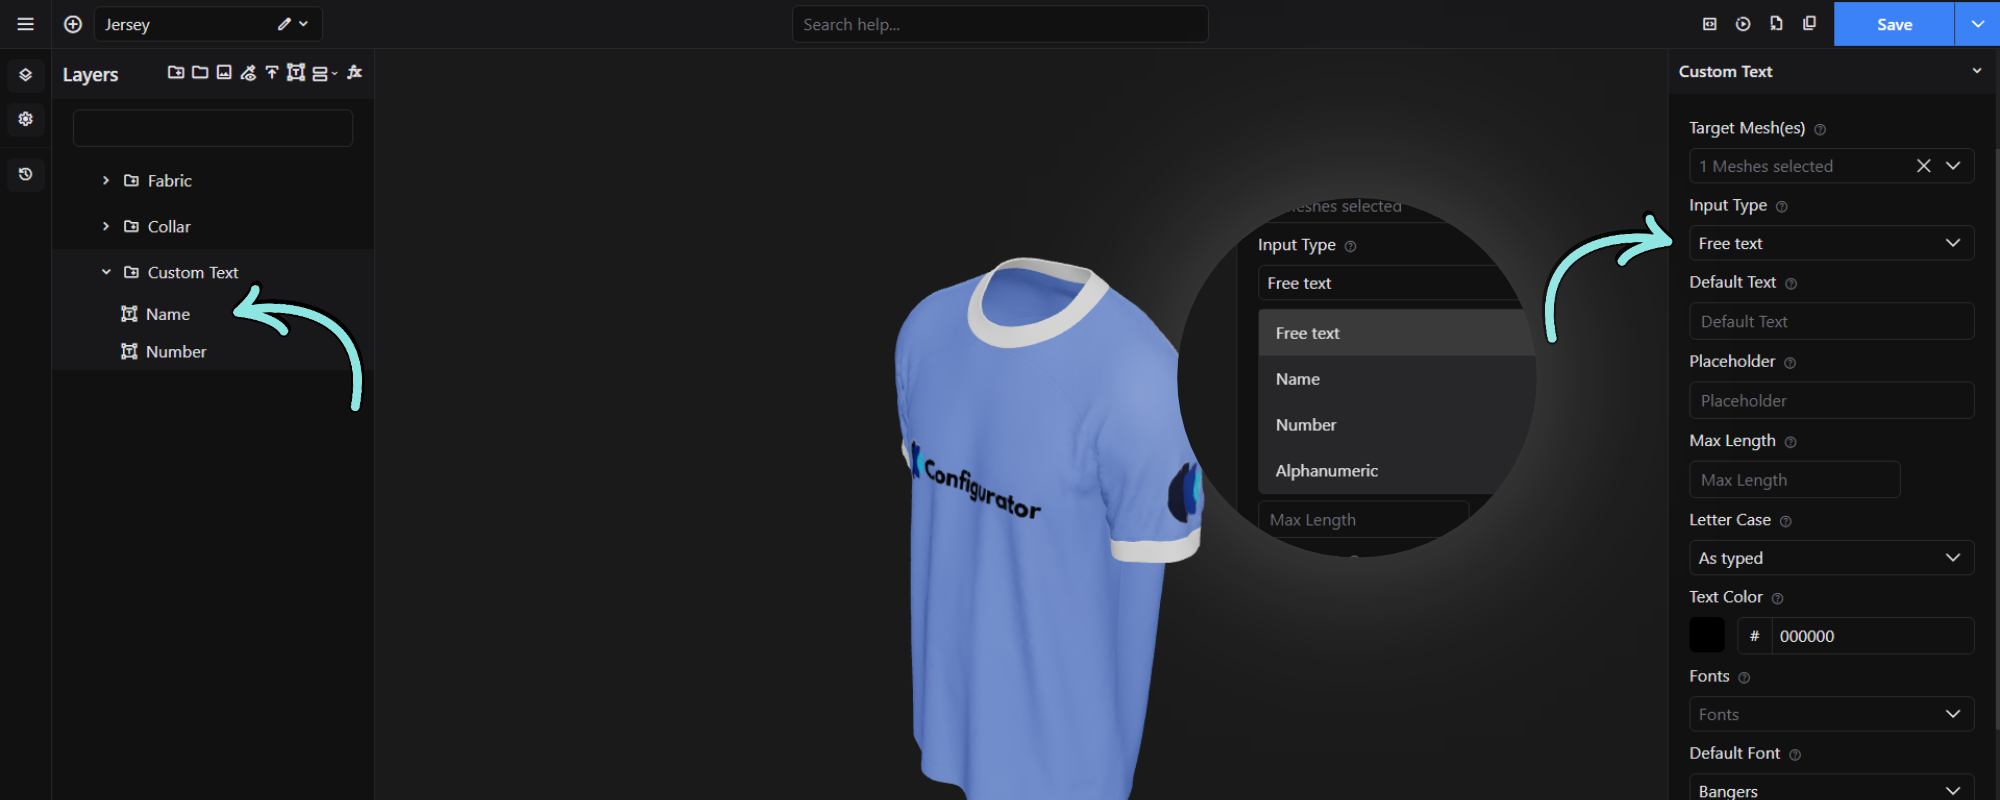
| Input Type | Controls which characters are allowed (see below). |
| Default Text | Optional. Shown on the model and in the box until the customer changes it. Leave it empty to keep whatever is already printed on the model. |
| Placeholder | Optional. A hint shown in the empty box, such as Type your name. |
| Max Length | The most characters allowed, from 1 to 100. Leave it empty to allow 30. |
| Letter Case | As typed, Uppercase or Lowercase. Uppercase is handy for jersey names. |
Input types
| Type | Allows |
|---|---|
| Free text | Any characters |
| Name | Letters, spaces, apostrophes, full stops and hyphens |
| Number | Digits only |
| Alphanumeric | Letters, digits and spaces |
Characters that are not allowed are removed as the customer types, so what they see in the box is exactly what is printed.
Colour and fonts
| Setting | What it does |
|---|---|
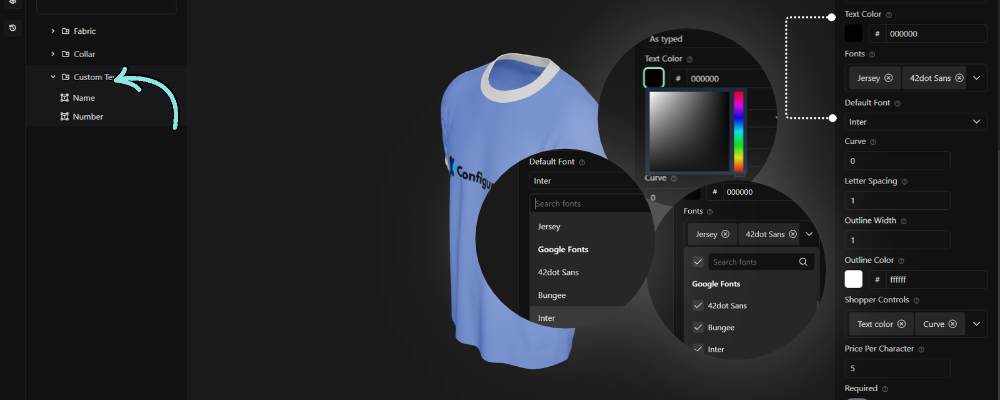
| Text Color | The colour of the text. This is the starting colour; you can let customers change it (see Shopper Controls). |
| Fonts | The fonts customers can choose from. The list holds the fonts you added on the Fonts page, in two groups: Custom Fonts and Google Fonts. Type in the search box to find one. |
| Default Font | The font used until the customer picks one. It must also be picked in Fonts. First selected font uses the first font you picked. |
Leave Fonts empty to use one standard font and give customers no font choice.
If the Fonts list is empty, you have not added any fonts yet. Add them on the Fonts page first.
Add your fonts (the Fonts page)
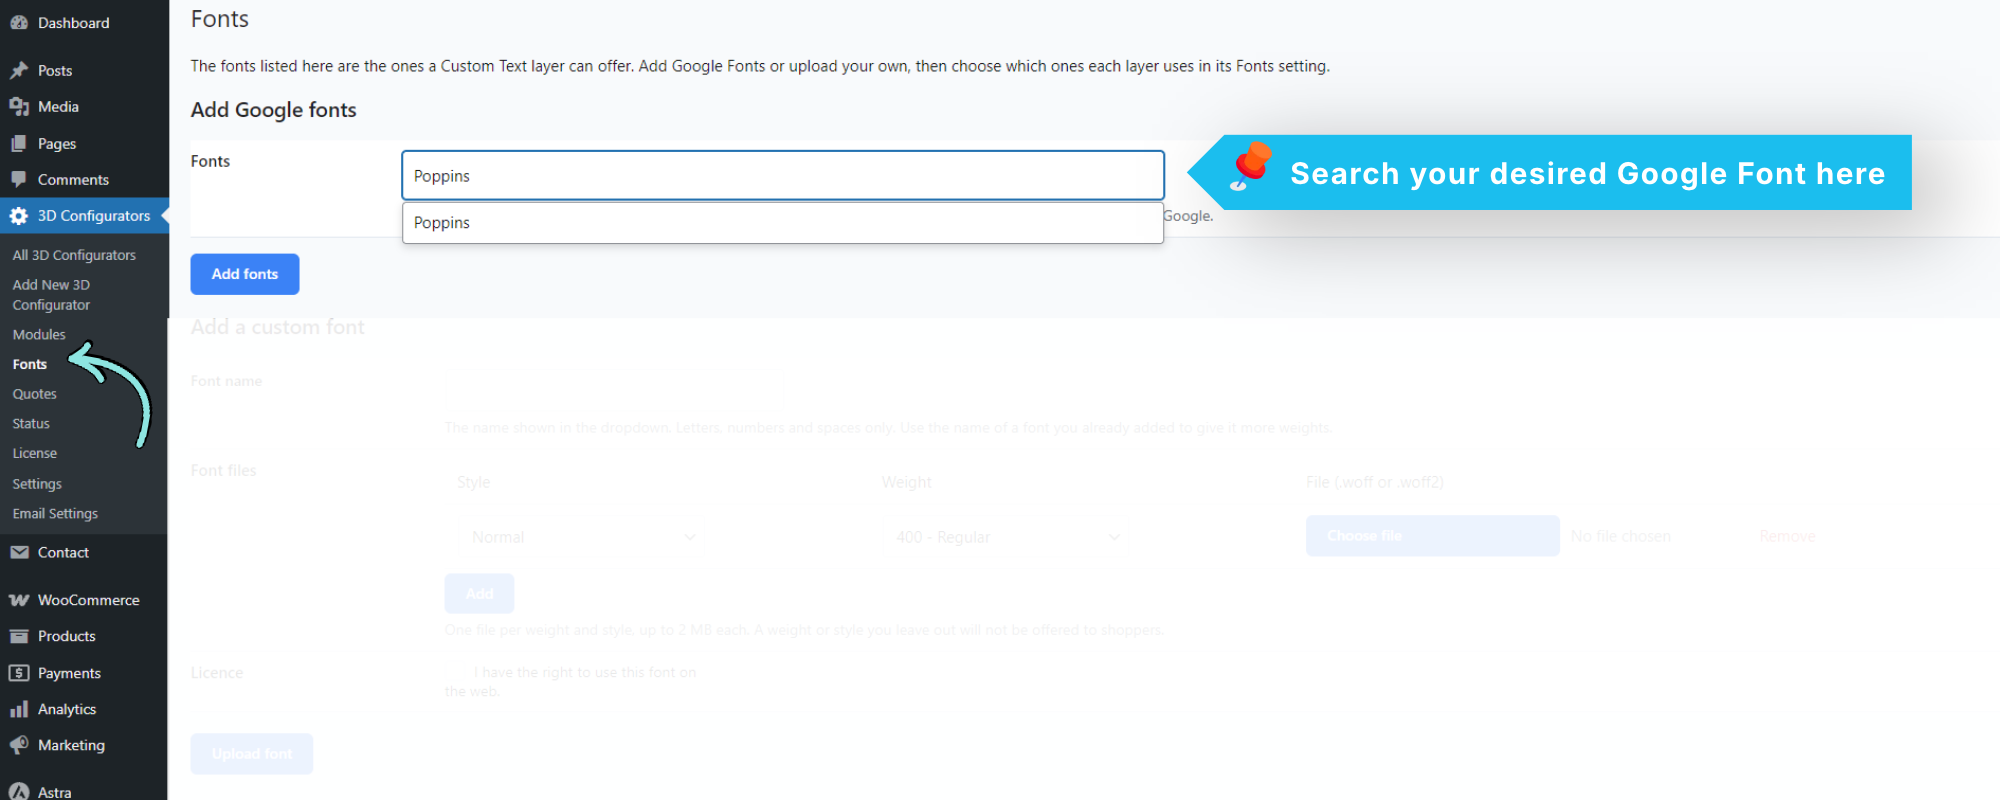
Go to wp3dconf → Fonts. This page is the one place where you decide which fonts exist on your site. The editor only shows what you add here, so a short list stays easy to pick from.
Add Google fonts
- Click the Fonts box under Add Google fonts and search for a font. Pick as many as you like.
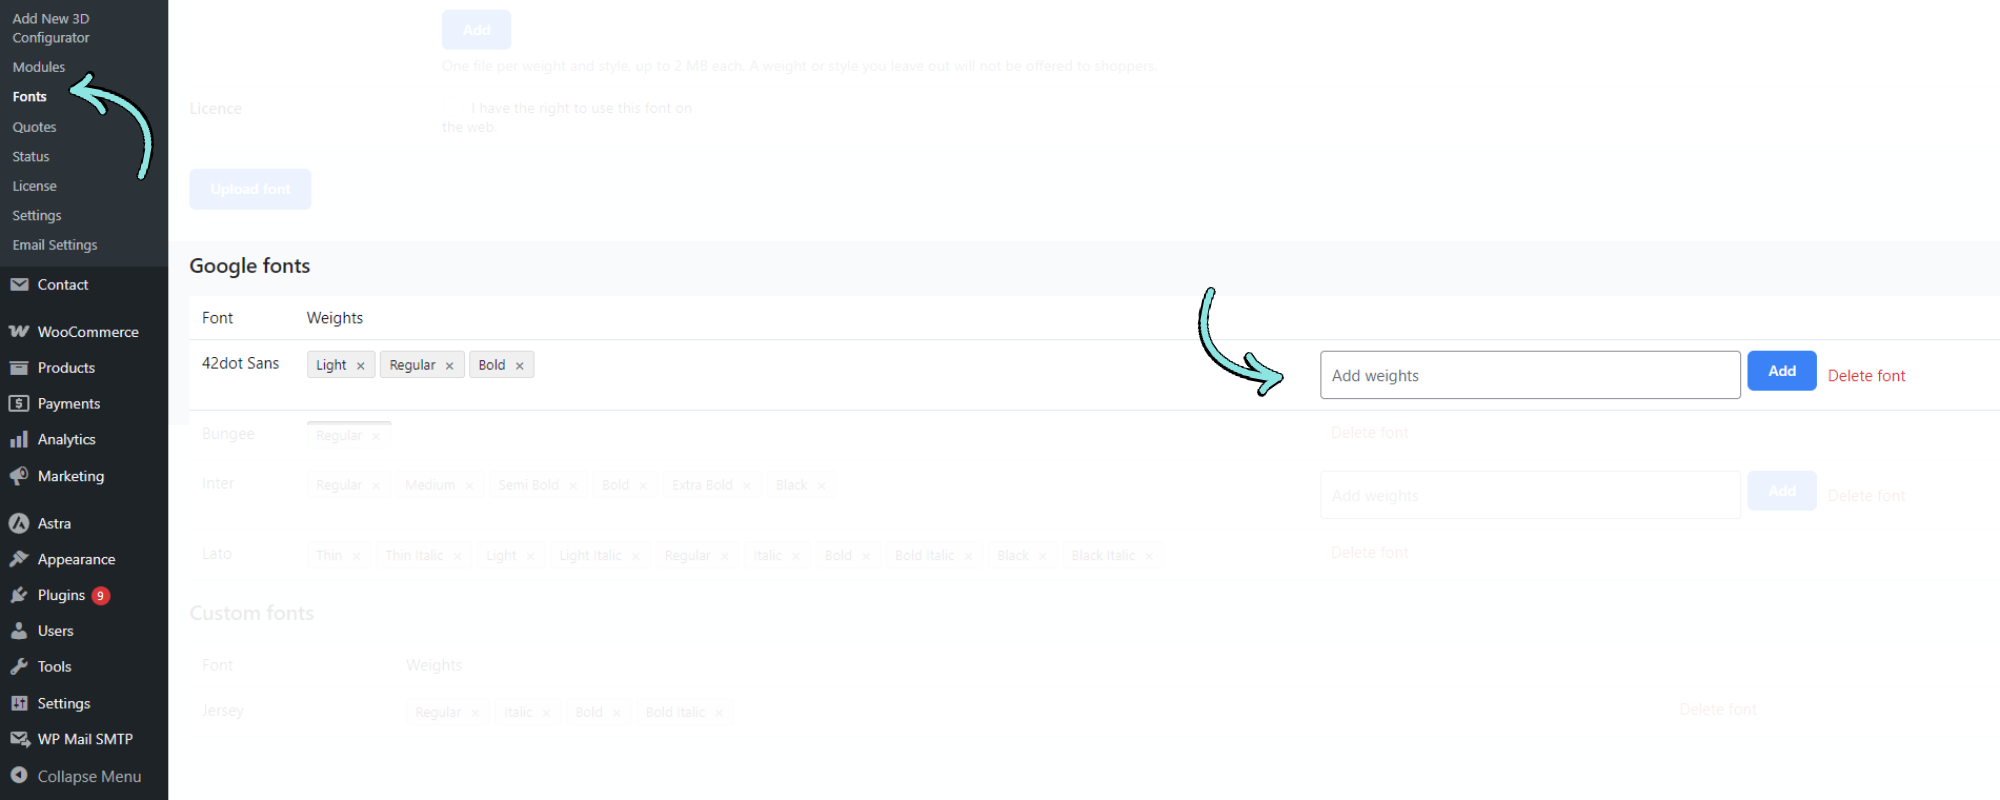
- Each font you pick gets its own row with a Weights box. Regular is already chosen. Add more weights (Bold, Italic and so on), or press All to take every weight. Remove drops that font from the list.
- Click Add fonts. A progress bar shows each font as it is downloaded, one after the other.
- When it finishes, the page reloads and your fonts are listed under Google fonts.
Things to know:
- Keep the page open until the bar finishes. If you leave, the rest is not added. Cancel stops after the batch being downloaded.
- The files are downloaded to your own website, so your customers’ browsers never contact Google.
- Only the Latin alphabet is downloaded.
- If a weight cannot be downloaded (for example Google does not have it for that font), it is listed under the bar and the rest carry on. Add the others again later if you need to.
- To add more weights to a font you already added, use the Add weights box beside it in the list.
Add your own font
Use this for a font you bought or designed, as a .woff or .woff2 file.
- Under Add a custom font, type a Font name. This is what shows in the dropdown. Use letters, numbers and spaces only.
- Under Font files, each row is one weight. Choose its Style (Normal or Italic), its Weight (100 Thin to 900 Black), then press Choose file and pick the file. Press Add for another row.
- Tick the box to confirm you have the right to use the font on the web, then click Upload font.
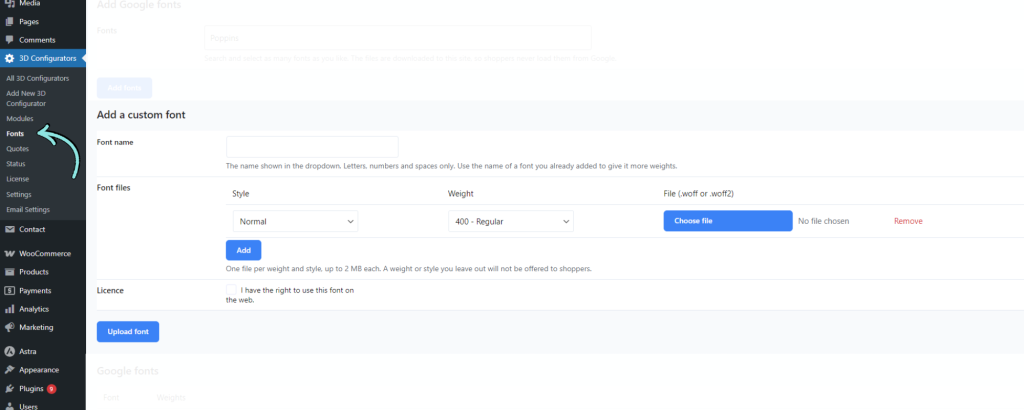
Things to know:
- One file per weight and style, up to 2 MB each. A weight you leave out is not offered.
- To add a weight to a font you already uploaded, upload again with the same font name.
- A custom font cannot share a name with a Google font. Choose a different name.
- Every row is tried even if another fails. The message lists what went wrong.
Delete a weight or a font
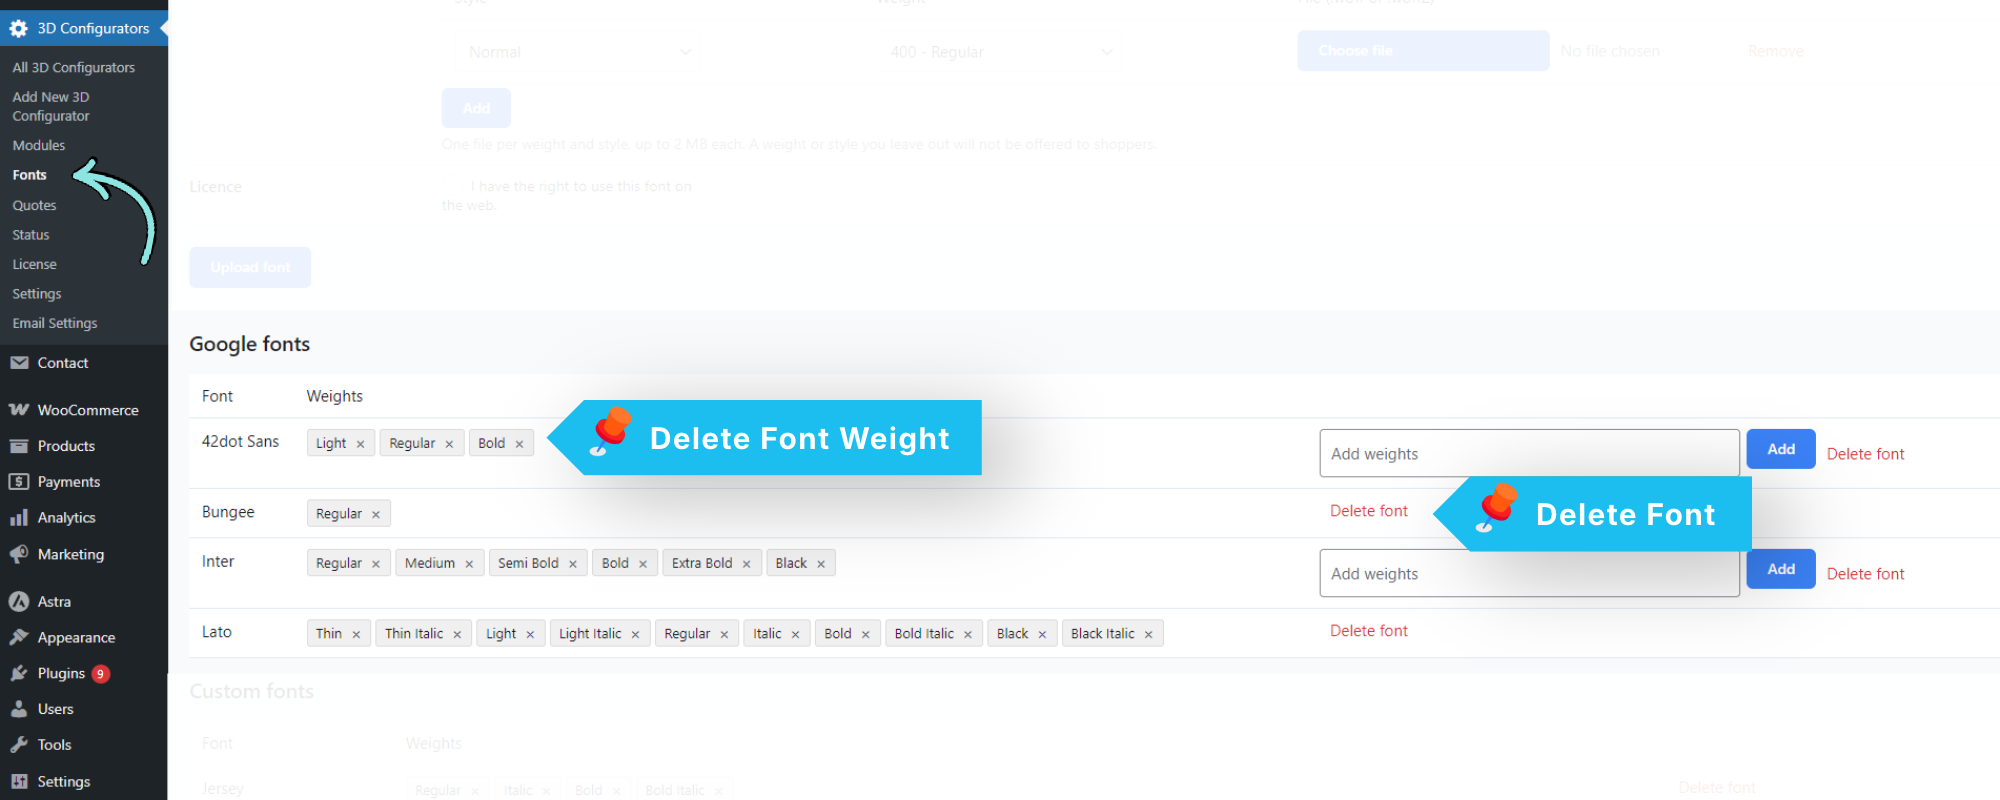
Each weight shows as a small tag in the list. Click the × on a tag to delete that weight, or Delete font to delete the font and all its weights. You are asked to confirm.
A deleted font is no longer offered to customers. A layer that used it falls back to its other fonts, or to the standard font if there are none.
What customers see
Today a customer sees each font in one weight: Regular, or the lightest weight the font has if there is no Regular. The other weights you add are stored on your site, but the Customize popup does not offer a weight choice yet.
Limits
| Fonts on the site | 200 |
| Weights and styles per font | 18 |
| File size | 2 MB each |
| File types | .woff, .woff2 |
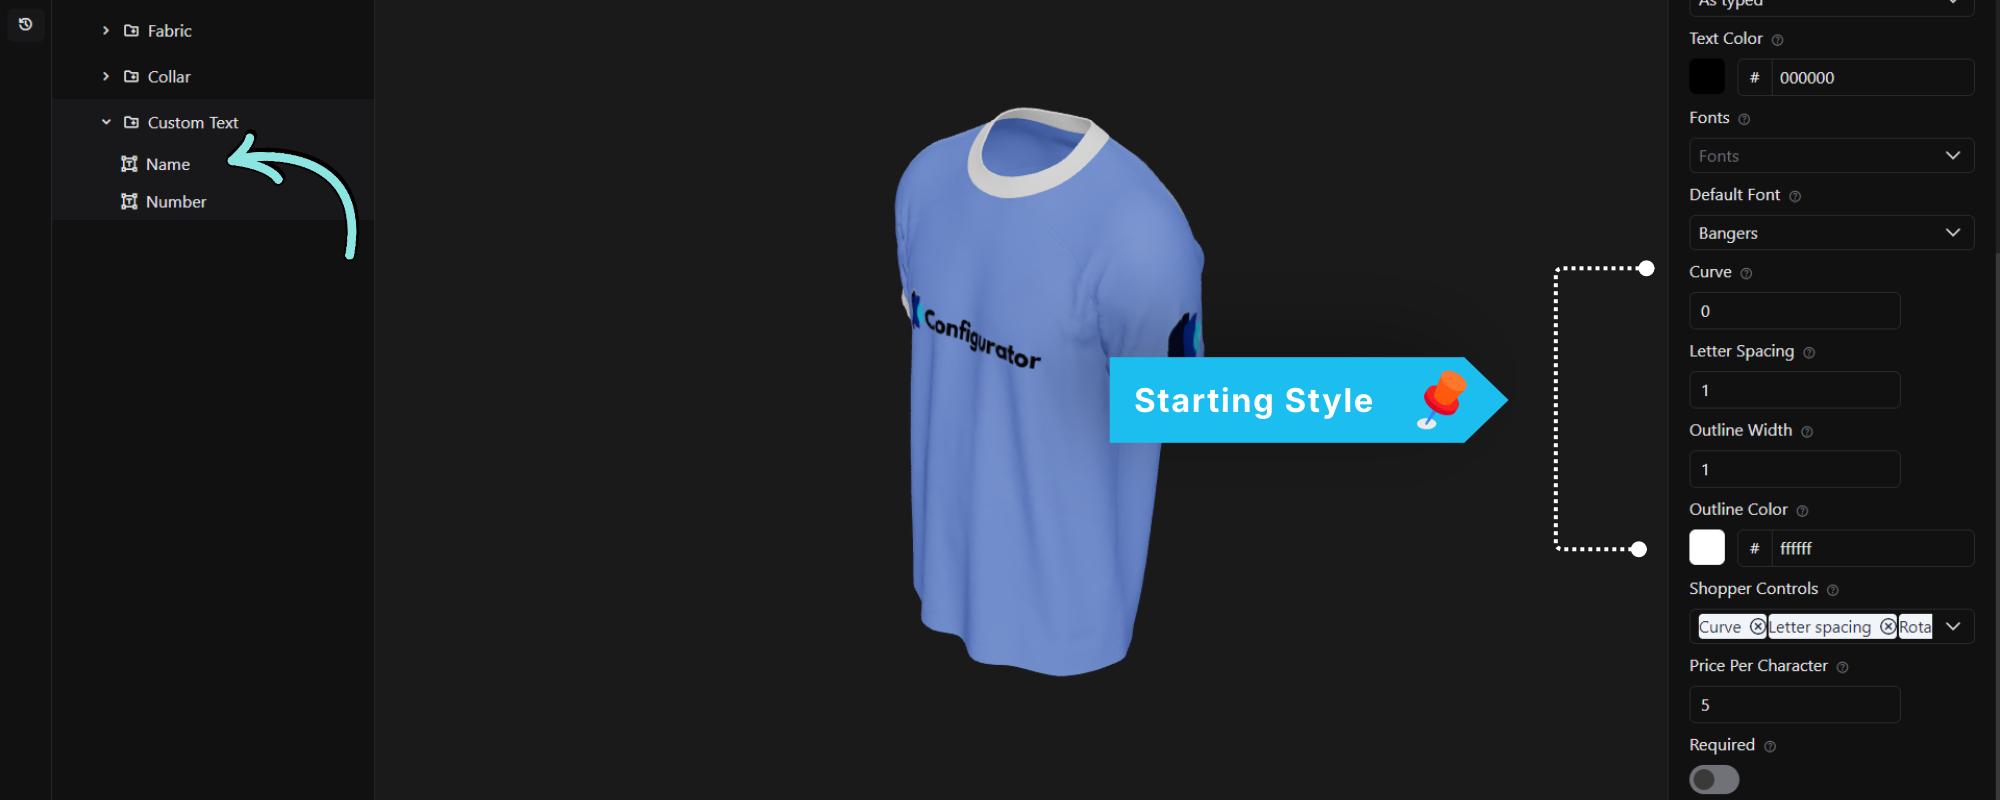
Starting style
These settings decide how the text looks before the customer changes anything.
| Setting | Range | What it does |
|---|---|---|
| Curve | -100 to 100 | Bends the text. Positive arches it upward like a name above a number, negative bends it down, 0 is straight. |
| Letter Spacing | -10 to 50 | Space between letters. 0 uses the font’s normal spacing. |
| Outline Width | 0 to 20 | A line around each letter. 0 means no outline. |
| Outline Color | any colour | The colour of that line. |
Shopper Controls: what customers can change
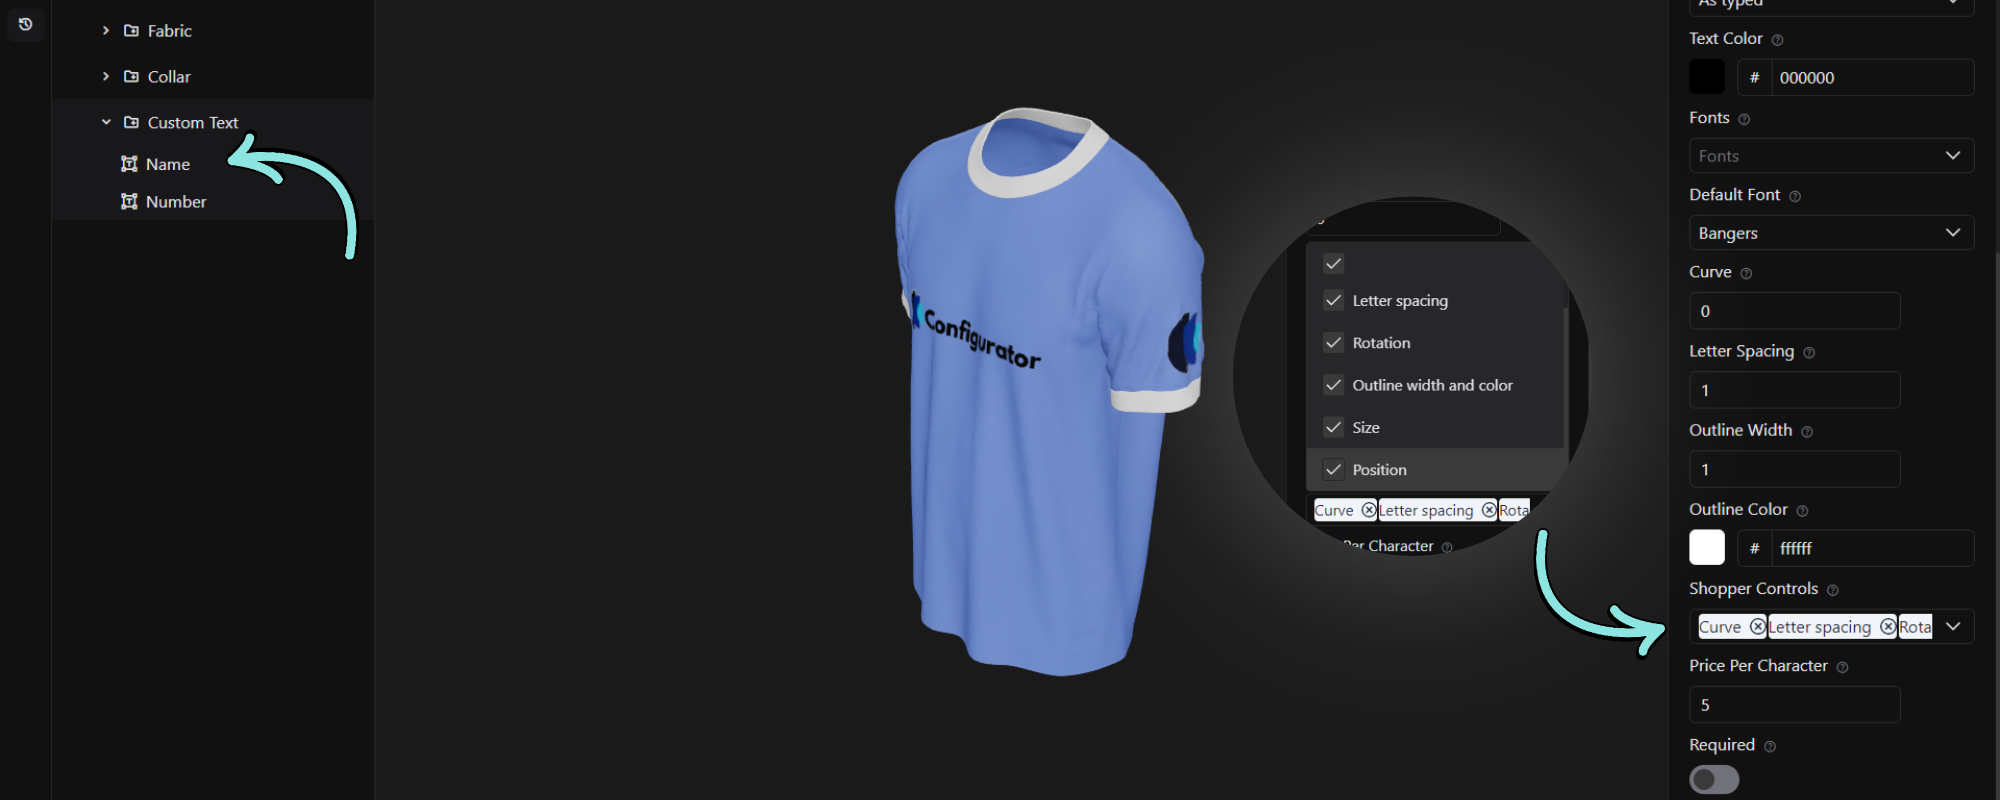
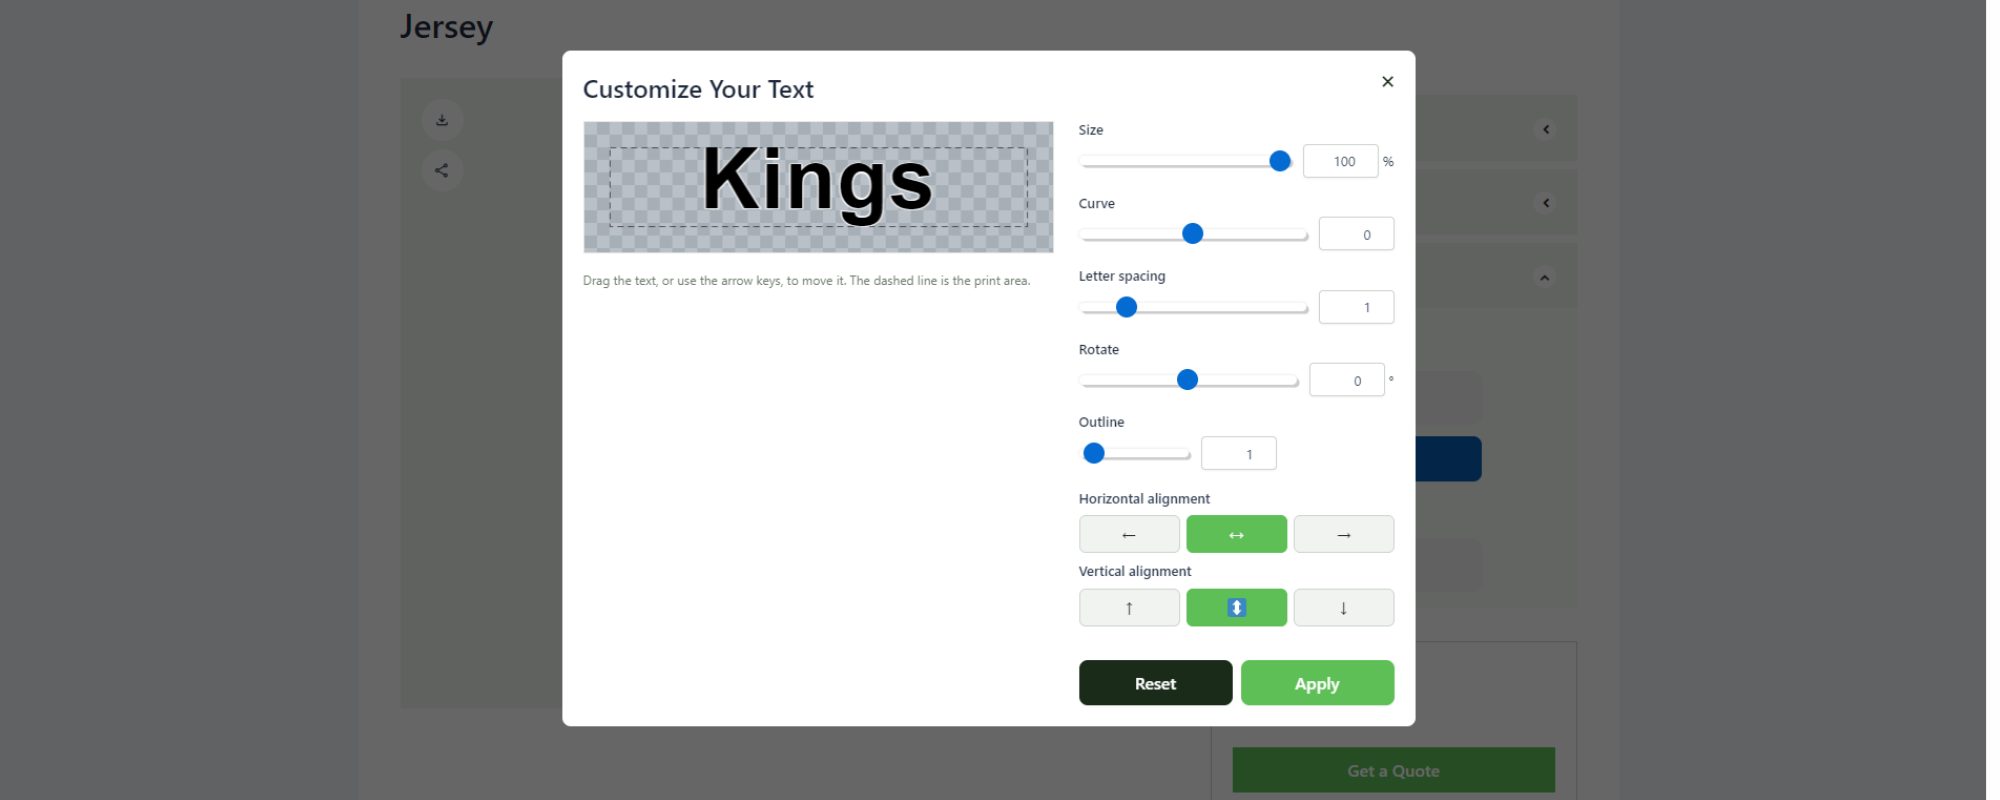
Customers customise their text in a Customize popup. It has a live preview, so they can see the result before applying it.
Shopper Controls is where you choose what appears in that popup. Tick the ones you want:
| Control | Lets the customer change |
|---|---|
| Text color | The colour of the text |
| Curve | How much the text is bent |
| Letter spacing | The space between letters |
| Rotation | Turn the text, from -180° to 180° |
| Outline width and color | The outline |
| Size | Make the text smaller (down to 25%) |
| Position | Move the text, by dragging, with the arrow keys, or with the alignment buttons |
Anything you do not tick stays exactly as you set it above.
The Customize button appears next to the text box when the customer has more than one font to choose from, or at least one control ticked. If neither applies, customers just see the text box.
Tip. If you want a simple experience, tick nothing and offer one font. If you sell personalised gifts, tick Text color and offer a few fonts.
Price and required text
| Setting | What it does |
|---|---|
| Price Per Character | Optional. Added for every character the customer types. Spaces are free. |
| Required | The customer must type something before they can add to the cart or send a quote request. |
The layer’s normal price (in Price Settings) is charged once on top of the per-character price. For example, a layer price of $5 plus $0.50 per character comes to $7 for a 4-letter name.
A layer with no text costs nothing.
The price moves on screen as the customer types, so they always see what they will pay.
If a customer leaves a required layer empty, they see “Please enter text for: …” with the layer’s name, and cannot continue until they fill it in. A layer hidden or switched off by Conditional Logic is not asked for.
What your customers see
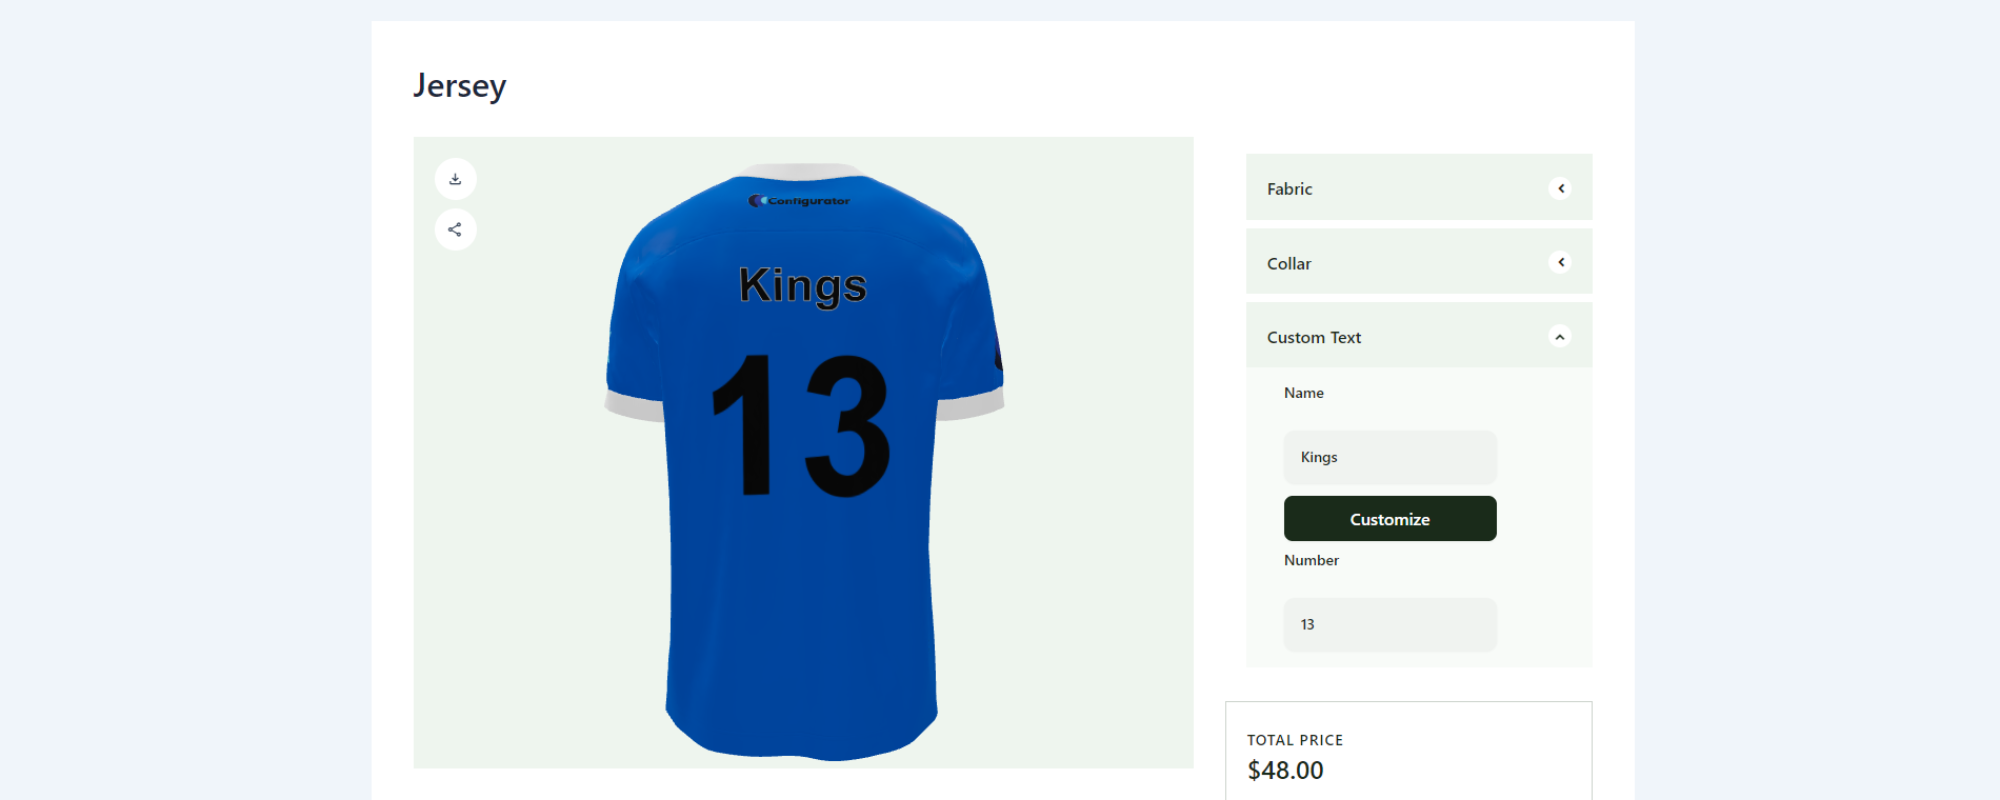
- They type in the text box. The text appears on the model straight away.
- If you gave them controls or fonts, they press Customize to open the popup, adjust things, and press Apply. Reset puts everything back to how you set it.
- They add to the cart or request a quote as usual.
Your orders, quotes, emails and PDFs list the text on one line, for example:
Text: ALEX · Font: Pacifico · Color: #ff0000 · Rotation: 10°
Only the things the customer changed are listed. Style settings left at your defaults are not repeated.
Tips for good results
- Test on your own page. Type a long name and a short one, change the font, and look at the model from a few angles.
- Offer a few fonts, not a hundred. A short, well-chosen list is easier for customers to use.
Troubleshooting
| Problem | What to check |
|---|---|
| Message “not set up correctly” appears | Pick a Target Mesh(es) for the layer. |
| Text appears in the wrong place, stretched or upside down | This is the model, not a setting. Send your designer the Blender guide. |
| The Fonts list in the editor is empty | Add fonts on the wp3dconf → Fonts page first, then reload the editor. |
| Customers cannot choose a font | Pick at least two fonts in Fonts on the layer, then Save. A font that was deleted from the Fonts page is not offered. |
| A Google font fails to add | The reason is listed under the progress bar. Your server may not be able to reach Google; try again later. |
| A font you picked earlier no longer shows as picked | It was saved before the Fonts page existed. Add it on the Fonts page, then pick it again on the layer. Until then it still works for customers. |
| Uploading a font fails | Use a real .woff or .woff2 file under 2 MB whose ending matches its type. A renamed file of another type is refused. |
| No Customize button | Tick at least one Shopper Controls option, or offer more than one font. |
| Customers cannot change the colour | Tick Text color under Shopper Controls on this layer. Layers saved before this option existed do not have it ticked. |
| Text is cut short | The customer reached Max Length. |
| The text does not show in the price | Check that Price Per Character is above 0 and the layer is active. |
| Custom Text is not in the layer list | Turn on Custom Text under wp3dconf → Modules (Pro only). |