Audience: 3D artists preparing a GLB for the Custom Image Upload layer. Not for: shop owners. This covers the model, not the plugin settings.
Custom Image Upload puts a shopper’s image onto a target mesh. The plugin does not project the image onto your model. It swaps the texture on a mesh you supply, so the mesh has to be built for it. If the mesh is wrong, the artwork lands in the wrong place, stretched, or fights with the base surface. No plugin setting fixes that afterwards.
How it works
The shopper’s image is applied to a duplicate of the product mesh that sits on top of the original. The original keeps its own material. The duplicate carries only the uploaded image, with transparency everywhere the image is not.
Base mesh (jersey)      -> normal material, never touched by the upload
Sticker mesh (copy)     -> uploaded image + alpha, sits a hair above the base
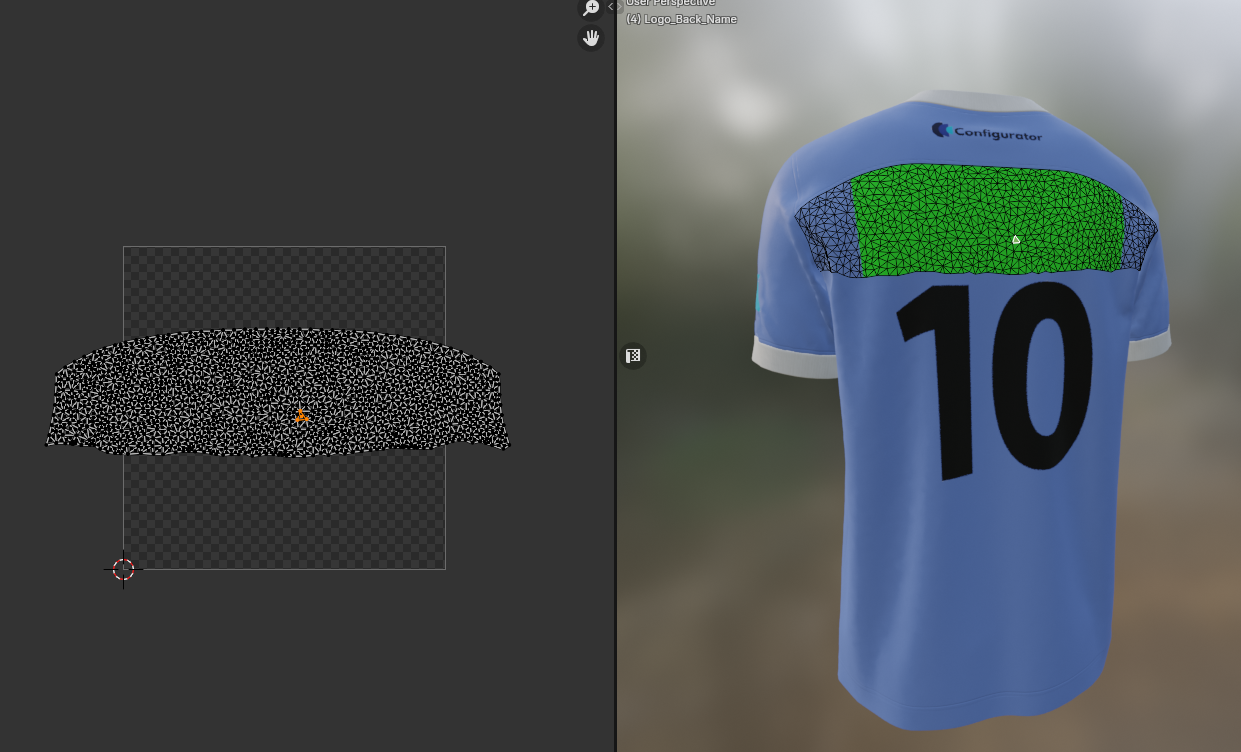
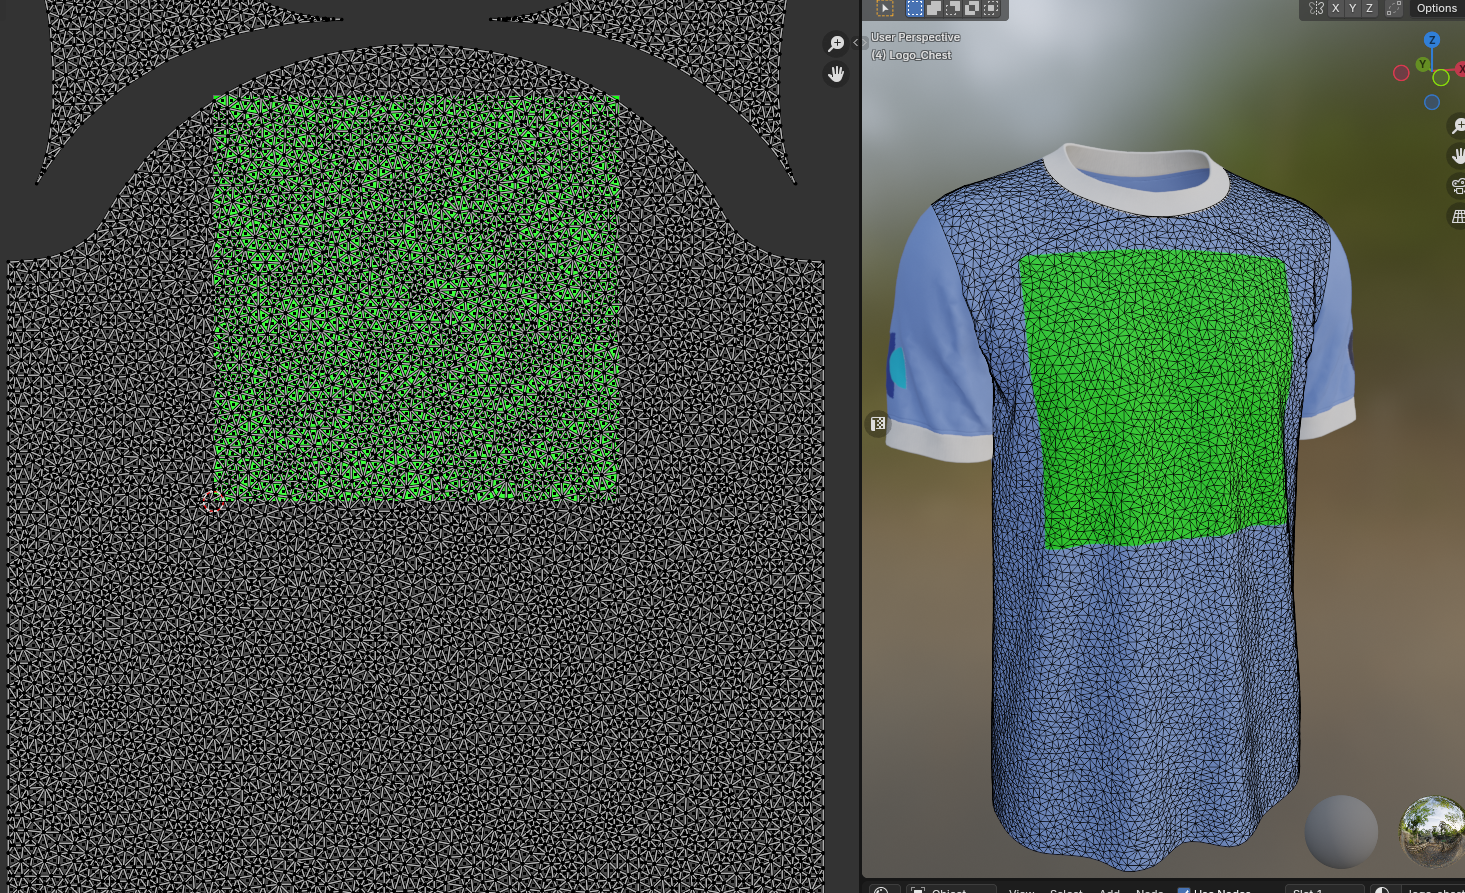
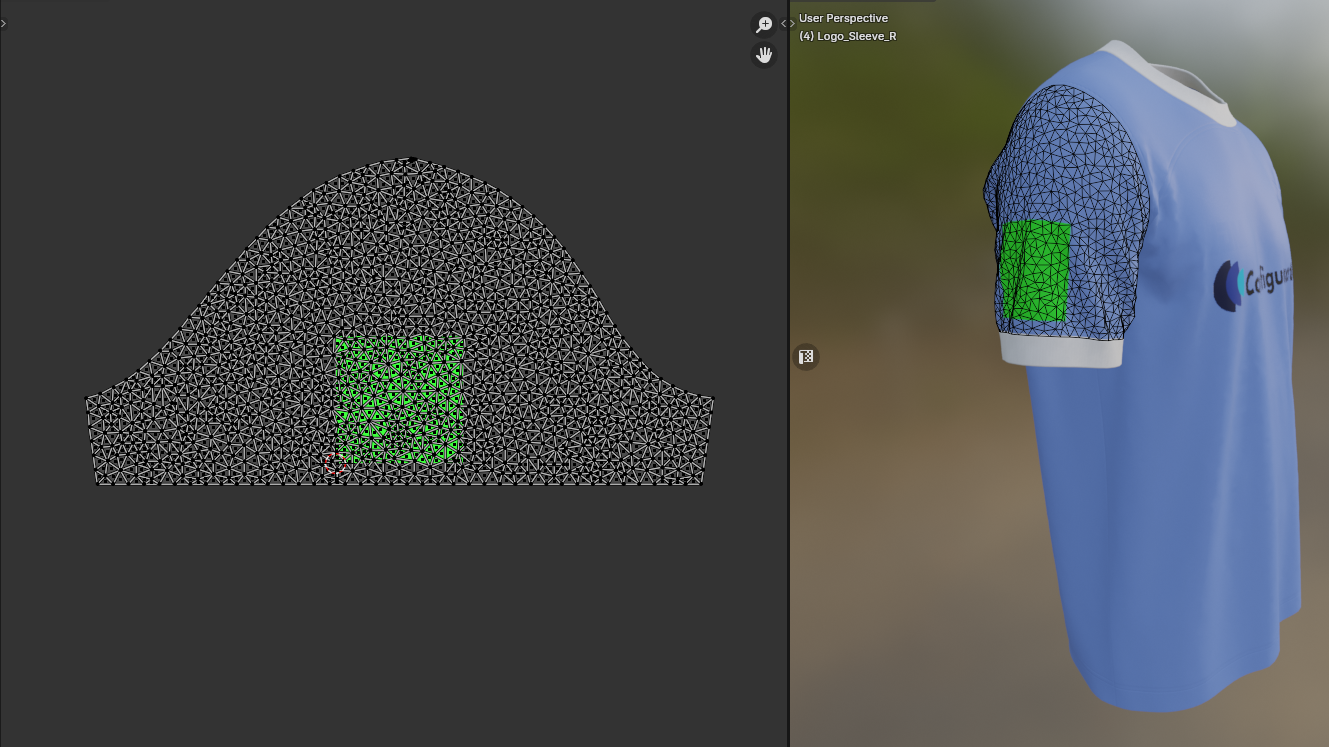
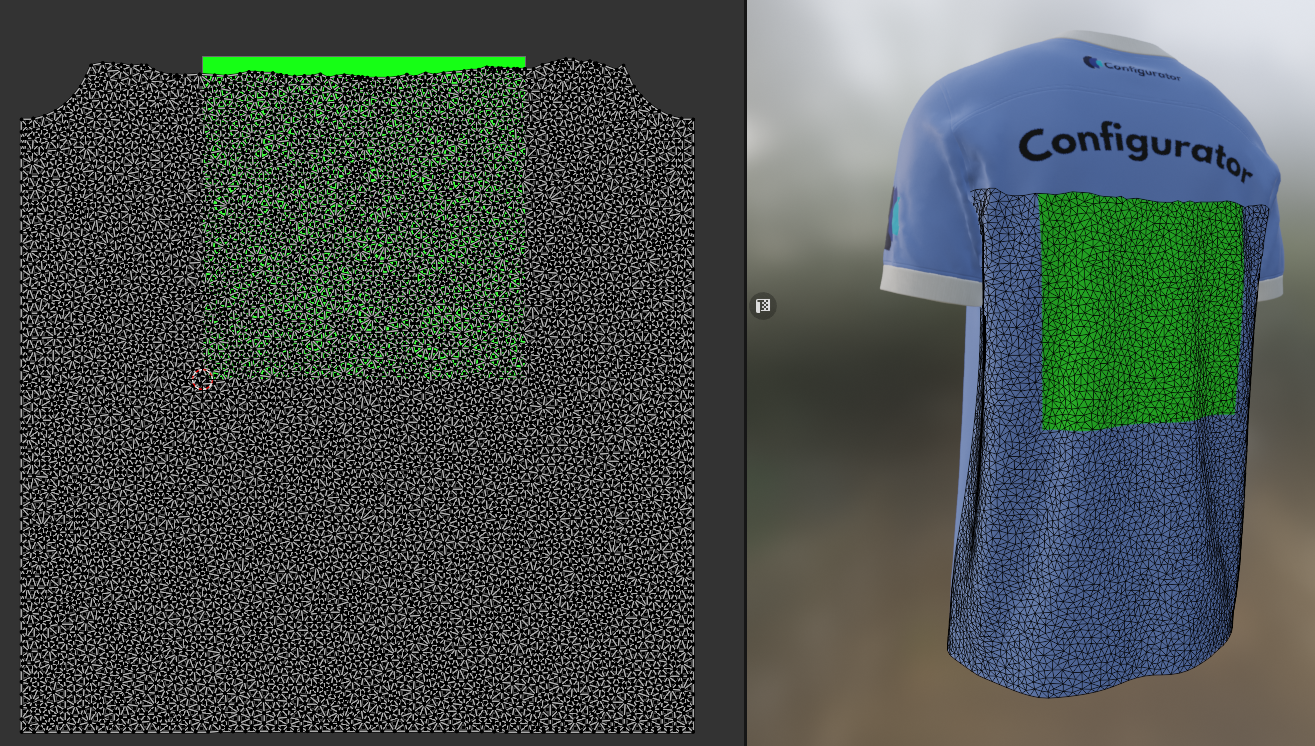
The image occupies the 0-1 UV square on the sticker mesh. Whatever part of the mesh’s UVs falls inside that square shows the image. Whatever falls outside shows nothing. The UV layout is the whole design.
Workflow
1. Duplicate the mesh
Select the mesh the artwork will sit on (e.g. the jersey body) and duplicate it (Shift+D, then Esc/right-click to cancel the move). Rename the copy so you can identify it later, e.g. Jersey_Sticker_Front.
2. One sticker mesh per print area
If the product has several independent print areas (front chest, back, sleeve), make one duplicate per area. Each area needs its own UV placement, and each is selected separately as a Target Mesh in the editor.
- If the same image should go on several parts (front and back), you can select several meshes as targets for one layer. They will all show the same image.
- If each area needs a different image, they need separate layers, so separate meshes.
3. Offset the sticker to prevent z-fighting
A coplanar duplicate flickers against the base surface. Push the sticker outward along its normals by a very small amount:
- Edit Mode, select all,
Alt+S(Shrink/Fatten), move slightly outward, or - add a Displace modifier with a tiny strength and apply it.
Keep it small. Too large and the sticker visibly floats at silhouette edges and on curved areas. Start around 0.001-0.002 units at real-world scale and check the model from grazing angles.
4. Build the sticker material with alpha
Give the duplicate its own material:
- Base Color: a texture slot the plugin will replace with the uploaded image.
- Alpha: driven by the texture’s alpha channel.
- Blend mode: alpha blend/clip (Material Settings > Blend Mode), so transparent regions really are transparent in the exported GLB.
Confirm in the exported GLB that the material’s alphaMode is BLEND or MASK. An opaque sticker material covers the whole jersey with a solid patch.
5. Adjust the UVs so the artwork lands correctly
This is the step that determines where and how big the image appears.
- Open the UV Editor on the sticker mesh.
- Move and scale the UV islands so the print area lines up with the 0-1 square. The square is the uploaded image, so the part of the mesh you want printed must sit inside it.
- Everything outside the square is not printed.
Match the square’s aspect ratio to the print area. The square is 1:1. If your print area on the model is physically wider than tall, scale the UVs non-uniformly to compensate, or the image will stretch on the model. Verify with a checkerboard or UV-grid texture before export. Squares must look like squares on the surface.
6. Keep the full mesh
Do not delete the geometry you don’t need on the duplicate, even if the print area is a small patch on a big garment. Hide the unused parts using the alpha map instead.
Deleting faces from the duplicate can cause a colour mismatch against the original mesh. Keeping the full mesh keeps shading, normals and lighting consistent with the base.
Image rules
- Use square images. The UV square is 1:1. A rectangular image is fitted into it and will stretch.
- Keep transparency in a PNG or WEBP. JPG has no alpha.
Check before export
Test with a checkerboard or UV-grid texture in the sticker slot:
Common problems
| Symptom | Cause |
|---|---|
| Image is stretched | Non-square source image, or UV area not matching the physical print area |
| Image appears mirrored or rotated | UV island flipped/rotated relative to the 0-1 square |
| Flicker or patchy overlap with the base | Sticker mesh is not offset from the base |
| Solid colour patch instead of transparency | Sticker material exported opaque |
| Sticker colour looks different from the garment | Faces were deleted from the duplicate, or the material differs from the base |
| Image repeats or smears outside the print area | Stray UVs outside the 0-1 square; pull them inside or confirm they are transparent |
Reference screenshots
- Left, UV layout: the checkerboard square is the uploaded image. Only what sits inside that square is shown on the jersey.
- Right, model: green marks the canvas/margins on the jersey. This is the area the image is mapped to.