The 3D Conditional Logic feature allows you to create dynamic behaviors within your 3D Configurator by defining rules that respond to user interactions. Instead of displaying or enabling every option by default, you can automatically show, hide, select, deselect, enable, disable, or modify layers based on specific conditions.
Conditional Logic is ideal for building guided product configurators, preventing incompatible selections, and creating intelligent workflows that improve the overall user experience.
For example, you can:
- Automatically show additional customization options after a user selects a specific color or accessory.
- Hide incompatible options when another option is selected.
- Automatically select or deselect related layers.
- Enable or disable product options based on user selections or pricing conditions.
- Trigger actions when a layer is selected, hidden, enabled, disabled, opened, closed, or when pricing thresholds are met.
Enable the Conditional Logic Module
Before you can use Conditional Logic in the 3D Configurator editor, you must first enable the Conditional Logic module.
To enable it:
- From your WordPress Dashboard, navigate to 3D Configurators → Modules.
- Locate the Conditional Logic module.
- Toggle the switch to Enable it.
- Click Save.
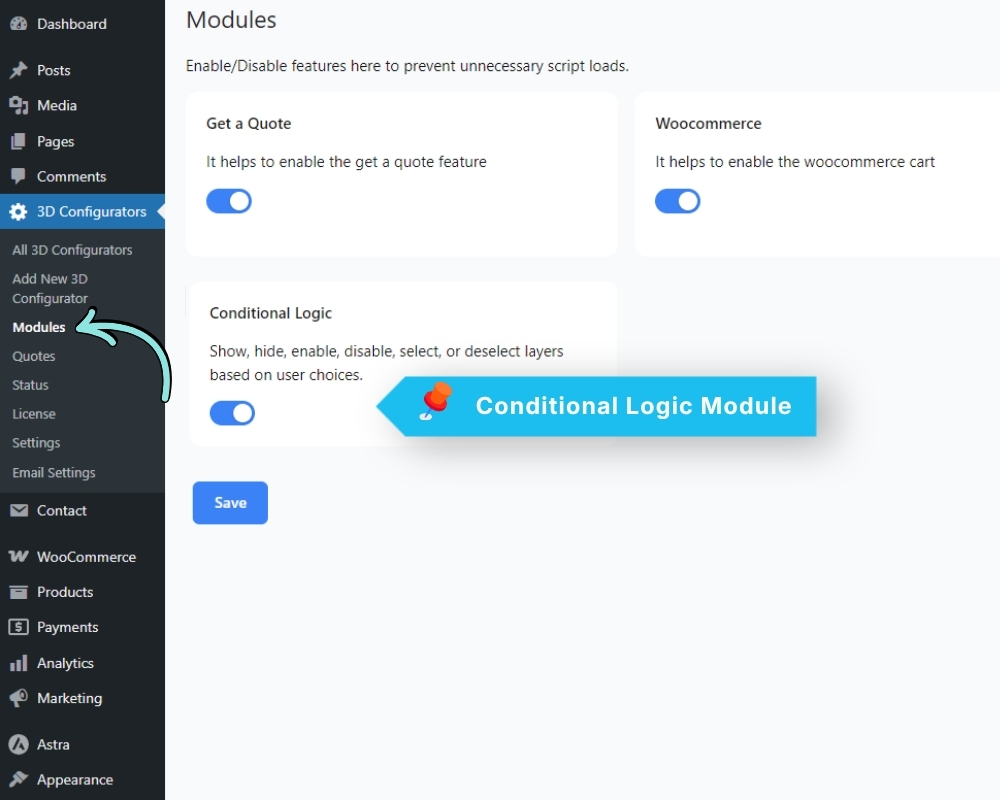
Once the module is enabled, the Conditional Logic button will become available in the configurator editor, allowing you to create and manage your conditional rules.
Accessing Conditional Logic
After enabling the Conditional Logic module:
- Open your 3D Configurator in the editor.
- Click the Conditional Logic icon located in the top-right corner of the editor toolbar.
- The Conditional Logic window will open, allowing you to create and manage your rules.
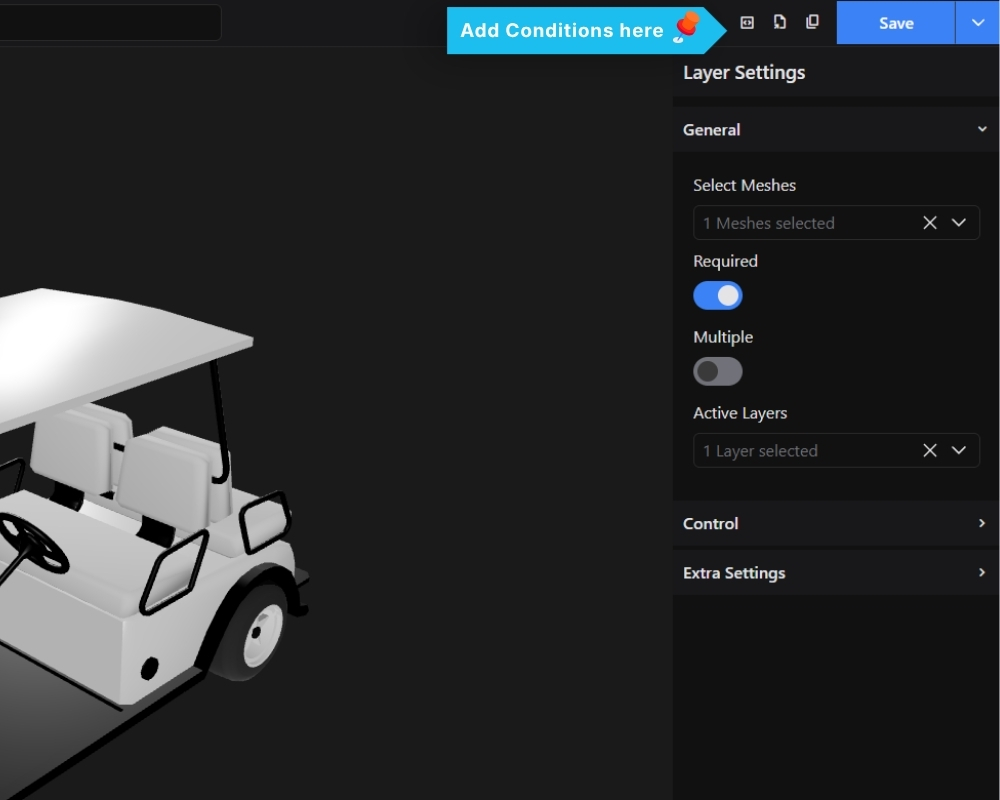
Once opened, you can create new conditions, organize them into groups, and define IF and THEN statements to control how your configurator behaves.